Welcome to the World of IT Home Labs with Mini PCs and Proxmox!


If you’ve ever wanted to explore the world of virtualization, containerization, or simply sharpen your IT skills, building your own home lab is a fantastic place to start. With the rise of powerful yet affordable mini PCs, setting up a full-featured lab environment at home has never been easier. In this post, we’ll walk you through the essentials of starting an IT home lab using a mini PC, Proxmox as your hypervisor, and managing virtual machines (VMs), LXC containers, and Docker containers with ease with illustrated diagrams and screenshots to make it easier to follow.
Why Start a Home Lab?
A home lab is the perfect environment for learning, experimenting, and testing without risking production systems. Whether you’re an IT professional, a student, or just an enthusiast, a home lab lets you:
- Practice new technologies hands-on
- Learn about virtualization and containerization
- Experiment with automation and orchestration tools
- Test new software before deploying it in production
- Build projects that can scale in the cloud later
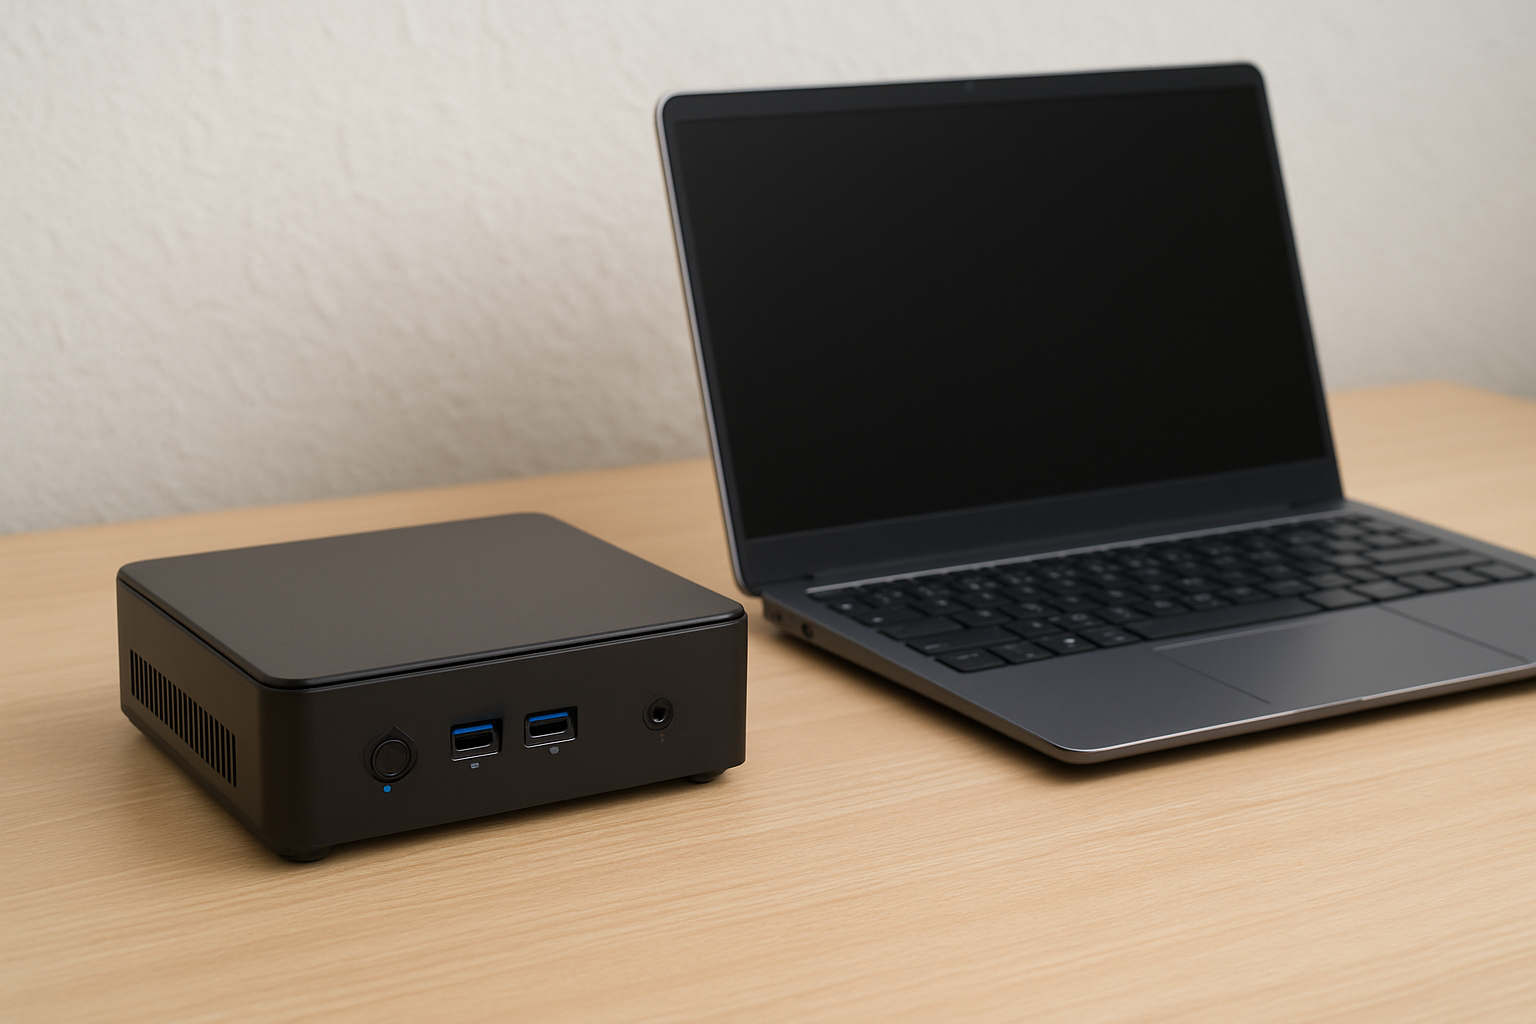
Choosing Your Hardware: Mini PC
Mini PCs are small, energy-efficient, and surprisingly powerful devices perfect for running a home lab. Some key benefits include:
- Low power consumption
- Small form factor (doesn’t take much space)
- Affordable entry point compared to rack servers
- Support for virtualization features (Intel VT-x/AMD-V)
Popular options include Intel NUCs, Beelink, MinisForum, or other small form factor PCs. Make sure your device supports at least 16GB RAM and has SSD storage for the best performance.
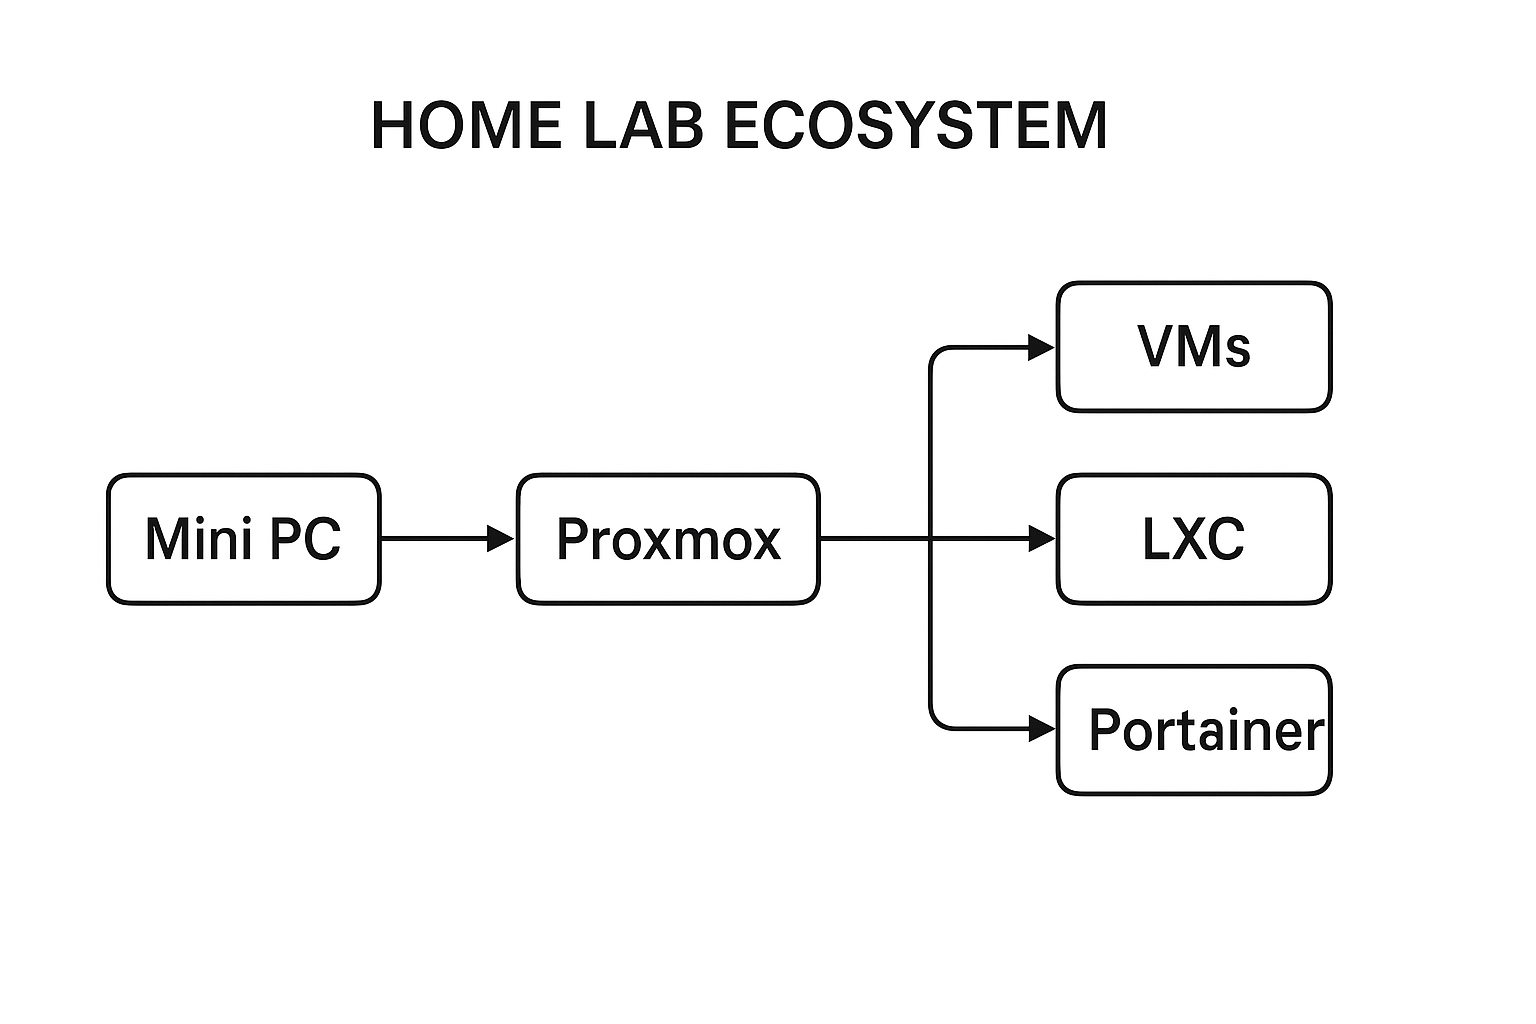
Setting Up Proxmox as Your Hypervisor
Proxmox Virtual Environment (PVE) is a free and open-source hypervisor that makes virtualization simple and powerful. It allows you to run:
- Virtual Machines (VMs): Full operating systems with isolated environments.
- LXC Containers: Lightweight system containers that use fewer resources than VMs.
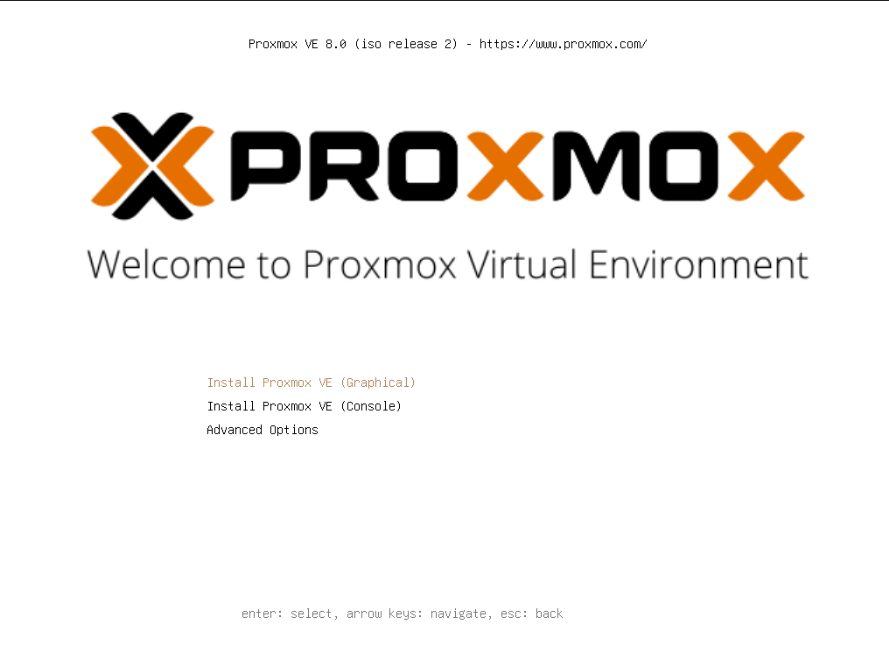
Step 1: Install Proxmox
- Download the latest Proxmox ISO from the Proxmox website.
- Flash the ISO to a USB drive using a tool like Rufus or Balena Etcher.
- Boot your mini PC from the USB drive and follow the installation wizard.
- Set up networking and root password.
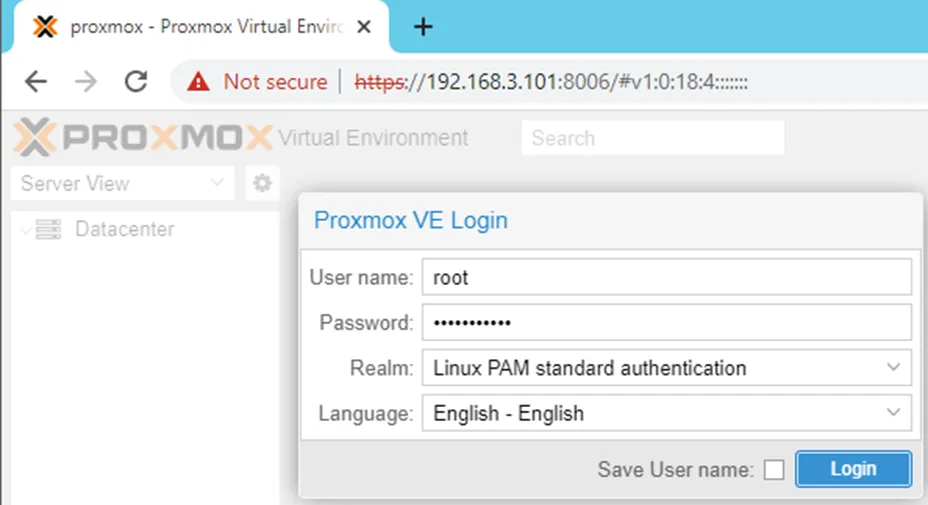
After installation, you can access the Proxmox web interface by entering your mini PC’s IP address in a browser: https://your-ip:8006.
Creating Your First Virtual Machine (VM)
- Log in to the Proxmox web UI.
- Click Create VM in the top-right corner.
- Upload an ISO (e.g., Ubuntu Server or Windows) to your Proxmox storage.
- Assign CPU, memory, and disk resources.
- Complete the wizard and start your VM.
Deploying LXC Containers
- Click Create CT in Proxmox.
- Choose a Linux distribution template (Ubuntu, Debian, etc.).
- Allocate resources (RAM, storage, CPU).
- Start the container and access it via the console.
LXC containers are lightweight and perfect for running services like DNS, web servers, or monitoring tools.
Running Docker Containers with Portainer
To manage Docker containers easily, you can run Portainer on a VM or LXC:
- Deploy a lightweight Linux VM or container (e.g., Ubuntu Server).
- Access Portainer via
http://your-ip:9000and complete the setup.
Install Portainer:
docker volume create portainer_data
docker run -d -p 9000:9000 -p 8000:8000 \
  --name=portainer \
  --restart=always \
  -v /var/run/docker.sock:/var/run/docker.sock \
  -v portainer_data:/data \
  portainer/portainer-ce
Install Docker:
sudo apt update && sudo apt install -y docker.io docker-compose
sudo systemctl enable docker --now
Now you have a graphical interface for deploying and managing Docker containers, images, and stacks.
Conclusion
Starting an IT home lab with a mini PC, Proxmox, and container management tools like Portainer is one of the best ways to gain real-world experience. You’ll have the flexibility to run VMs, containers, and Docker workloads all on a compact and energy-efficient device.
Whether your goal is to learn, test, or innovate, your home lab will quickly become your go-to playground for IT exploration. In upcoming posts, we’ll dive deeper into advanced configurations, networking setups, and fun projects you can build with your home lab.
Thank you so much for taking the time to read my post! Your support and engagement truly mean a lot and inspire me to keep creating and sharing more valuable content. If you enjoyed this post, I’d love to hear your thoughts—feel free to leave a comment in the box below and join the conversation. And if you’d like to stay updated with the latest posts, tips, and insights, don’t forget to subscribe to my newsletter. By joining, you’ll be the first to know when new content is published, so you never miss an update.