Network UPS Monitoring Tools (NUT) with PeaNUT and Nutify Dashboards on Ubuntu/Debian

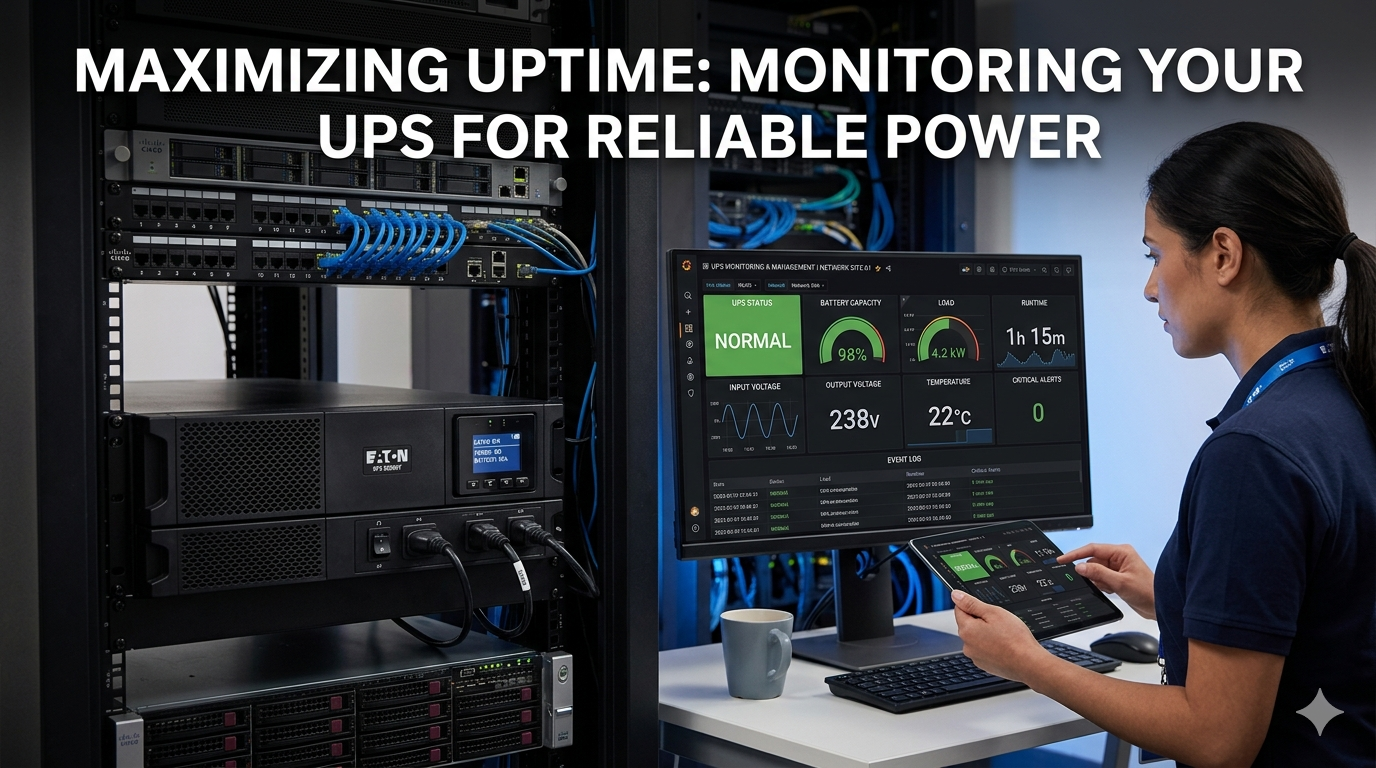
Keep your homelab protected. This guide walks you through installing NUT to monitor your UPS over the network, fixing the most common USB permissions pitfall, and deploying two excellent web dashboards — PeaNUT and Nutify — via Docker for a clean real-time view of your UPS status.
What Is NUT?
Network UPS Tools (NUT) is an open-source project that lets you monitor Uninterruptible Power Supplies (UPS) and take automatic actions — like gracefully shutting down servers — when power events occur. It works with hundreds of UPS models from APC, CyberPower, Eaton, and many others.
NUT has three main components:
- Driver (
usbhid-ups, etc.) — talks directly to the UPS hardware over USB or serial - Server (
upsd) — exposes UPS data over the network - Monitor (
upsmon) — watches UPS status and triggers shutdown commands
What Is PeaNUT?
PeaNUT is a lightweight, beautiful web dashboard for NUT built with Next.js. It gives you real-time UPS stats, charts, command execution, InfluxDB/Prometheus integration, and a built-in terminal to talk to the NUT server directly — all from your browser.
 Brandawg93
What Is Nutify?
Nutify is a more feature-rich UPS monitoring dashboard built with Python/Flask. Where PeaNUT is minimal and elegant, Nutify goes deeper — offering historical data stored in a SQLite database, detailed energy and battery reports, multi-channel notifications (email, Discord, Ntfy, webhooks), a multi-user authentication system with per-page permissions, and an interactive setup wizard. It can run as a full standalone NUT server or as a lightweight client connecting to an existing NUT server like the one we set up in this guide.
 DartSteven
Prerequisites
- Ubuntu 22.04 / 24.04 (or any Debian-based distro)
- A USB UPS device physically connected to your server
- Docker and Docker Compose installed (for PeaNUT)
sudoaccess
Part 1 — Install and Configure NUT
Step 1: Install NUT
bash
sudo apt update
sudo apt install nut nut-client nut-server -y
Step 2: Find Your UPS USB IDs
Plug in your UPS and run:
bash
lsusbLook for your UPS brand. Example output for an APC UPS:
Bus 002 Device 002: ID 051d:0002 American Power Conversion Uninterruptible Power SupplyNote the Vendor ID (051d) and Product ID (0002) — you'll need these.
Step 3: Configure the UPS Driver — /etc/nut/ups.conf
bash
sudo nano /etc/nut/ups.confAdd your UPS definition. Adjust vendorid and productid to match your device:
ini
[ups]
    driver = usbhid-ups
    port = auto
    vendorid = 051d
    productid = 0002
    desc = "My UPS"
Tip: The section name[ups]is the identifier you'll reference throughout NUT config. You can name it anything —[garage-ups],[server-room], etc.
Step 4: Configure the NUT Server — /etc/nut/upsd.conf
bash
sudo nano /etc/nut/upsd.confAllow connections from localhost (and optionally your LAN):
ini
LISTEN 127.0.0.1 3493
# Uncomment the line below to allow LAN access (e.g. for remote clients):
# LISTEN 0.0.0.0 3493
Step 5: Set Up Users — /etc/nut/upsd.users
bash
sudo nano /etc/nut/upsd.usersini
[admin]
    password = your_admin_password
    actions = SET
    instcmds = ALL

[upsmon]
    password = your_monitor_password
    upsmon master
Security: Change both passwords to something strong.
Step 6: Configure the Monitor — /etc/nut/upsmon.conf
bash
sudo nano /etc/nut/upsmon.confini
MONITOR [email protected] 1 upsmon your_monitor_password master
MINSUPPLIES 1
SHUTDOWNCMD "/sbin/shutdown -h +0"
POLLFREQ 5
POLLFREQALERT 5
HOSTSYNC 15
DEADTIME 15
POWERDOWNFLAG /etc/killpower
RBWARNTIME 43200
NOCOMMWARNTIME 300
FINALDELAY 5
Step 7: Set NUT Mode — /etc/nut/nut.conf
bash
sudo nano /etc/nut/nut.confini
MODE=standaloneUsestandaloneif the NUT server and client are on the same machine. Usenetserverif other machines will connect to this NUT instance.
Part 2 — Fix the USB Permissions (Critical Step!)
This is the most common issue with NUT on Ubuntu/Debian. By default, the nut user does not have permission to access USB devices, causing the driver to fail with:
Failed to open device (051D/0002), skipping: Access denied (insufficient permissions)Create a udev Rule
bash
sudo nano /etc/udev/rules.d/99-nut-ups.rulesAdd this line (replace 051d and 0002 with your actual vendor/product IDs from lsusb):
SUBSYSTEM=="usb", ATTR{idVendor}=="051d", ATTR{idProduct}=="0002", MODE="0660", GROUP="nut"Apply the Rule
bash
sudo udevadm control --reload-rules
sudo udevadm trigger
Verify It Worked
Find your UPS's USB path using lsusb (note the Bus and Device numbers):
Bus 002 Device 002: ID 051d:0002 American Power Conversion ...Then check the device permissions:
bash
ls -la /dev/bus/usb/002/002Expected output:
crw-rw---- 1 root nut 189, 129 Mar 27 23:04 /dev/bus/usb/002/002The group should be nut with rw group permissions. ✅
Part 3 — Start NUT Services
bash
sudo systemctl restart [email protected]
sudo systemctl restart nut-server.service
sudo systemctl restart nut-monitor.service
Verify All Services Are Running
bash
systemctl list-units | grep nutYou should see:
| Service | Status |
|---|---|
[email protected] | active (running) |
nut-server.service | active (running) |
nut-monitor.service | active (running) |
Test It
bash
upsc upsYou should see a full dump of your UPS data:
battery.charge: 100
battery.runtime: 3270
input.voltage: 120.0
ups.load: 14
ups.status: OL
...
ups.status: OL means Online — your UPS is running on mains power and monitoring correctly. 🎉
Part 4 — Install PeaNUT Dashboard via Docker
PeaNUT connects to your NUT server and gives you a polished web interface with real-time graphs, status cards, and UPS command execution.
Option A: Docker Run (Quick Start)
bash
docker run -d \
  --name PeaNUT \
  --restart unless-stopped \
  -v /path/to/config:/config \
  -p 8080:8080 \
  -e WEB_PORT=8080 \
  brandawg93/peanut:latest
Option B: Docker Compose (Recommended)
Create a docker-compose.yml:
yaml
services:
  peanut:
    image: brandawg93/peanut:latest
    container_name: PeaNUT
    restart: unless-stopped
    volumes:
      - ./config:/config
    ports:
      - 8080:8080
    environment:
      - WEB_PORT=8080
      # Optional authentication:
      # - WEB_USERNAME=admin
      # - WEB_PASSWORD=your_secure_password
Start it:
bash
docker compose up -dAccess PeaNUT
Open your browser and go to:
http://your-server-ip:8080Connect PeaNUT to Your NUT Server
On first launch, PeaNUT will ask you for the NUT server details. Enter:
- Host:
your-server-ip(or172.17.0.1if NUT is on the Docker host) - Port:
3493 - Username:
upsmon(from yourupsd.users) - Password: your monitor password
Note: If PeaNUT is running as a Docker container and NUT is on the same host, usehost.docker.internal(on Docker Desktop) or the host's Docker bridge IP (typically172.17.0.1) — not127.0.0.1, as that would refer to inside the container.
Part 5 — Optional Configuration
Enable Authentication
Set these environment variables in your Docker Compose file to require login:
yaml
environment:
  - WEB_USERNAME=admin
  - WEB_PASSWORD=your_secure_password
NUT Server Accessible From LAN (Remote Clients)
If you want other machines to connect to this NUT server, update /etc/nut/upsd.conf:
ini
LISTEN 0.0.0.0 3493And open the firewall port:
bash
sudo ufw allow 3493/tcpReverse Proxy with Nginx
To serve PeaNUT at a subdomain, add a proxy in your Nginx config:
nginx
server {
    listen 80;
    server_name peanut.yourdomain.com;

    location / {
        proxy_pass http://127.0.0.1:8080;
        proxy_set_header Host $host;
        proxy_set_header X-Real-IP $remote_addr;
    }
}
Homepage Widget Integration
If you use Homepage, add this to your services config:
yaml
widget:
  type: peanut
  url: http://your-peanut-ip:8080
  key: ups
Troubleshooting
Driver stuck on "activating" / never starts
Run the driver manually in debug mode to see the raw error:
bash
sudo /lib/nut/usbhid-ups -DDD -u root -a ups"Can't connect to UPS" in upsd logs
The driver isn't running or crashed. Check:
bash
sudo systemctl status [email protected]UPS not detected by lsusb
Check the physical USB cable and port. Try a different USB port. Some UPS models require the data cable (not just power) to be connected.
PeaNUT shows "connection refused"
Make sure upsd is listening on the correct interface. Check /etc/nut/upsd.conf and verify port 3493 is open if connecting from another machine.
Summary
| Step | What You Did |
|---|---|
| Installed NUT | apt install nut nut-client nut-server |
| Configured driver | /etc/nut/ups.conf with vendor/product ID |
| Fixed USB permissions | udev rule granting nut group access |
| Started services | nut-driver@ups, nut-server, nut-monitor |
| Verified UPS data | upsc ups returns live stats |
| Deployed PeaNUT | Docker container on port 8080 |
Your UPS is now fully monitored. If power fails, NUT will detect it and can gracefully shut down your servers before the battery runs out — protecting your homelab from data corruption and hardware damage.
Part 6 — Install Nutify Dashboard via Docker
Nutify is an alternative (or complementary) dashboard with a heavier feature set — detailed reports, energy monitoring, multi-user auth, notifications via email/Discord/Ntfy/webhooks, and historical data persistence in SQLite. It includes its own built-in NUT server, but can also run in CLIENT mode to connect to an existing NUT server like the one we set up in Parts 1–3.
Architecture Note: SERVER vs CLIENT Mode
Nutify supports two deployment modes:
- SERVER (Standalone): Nutify manages NUT internally — the UPS is plugged directly into the Nutify container host. Skip the NUT installation from Parts 1–3 in this case.
- CLIENT (Netclient): Nutify connects to an external NUT server. Use this if you already have NUT running (as we do in this guide). The setup wizard will ask for your NUT server's IP and port
3493.
Step 1: Pull the Correct Image for Your Architecture
| Architecture | Docker Image Tag |
|---|---|
| AMD64 / x86-64 (standard PC/server) | dartsteven/nutify:amd64-latest |
| ARM64 (Raspberry Pi 4+, Apple Silicon) | dartsteven/nutify:arm64-latest |
Step 2: Create the Docker Compose File
Create a directory and docker-compose.yaml:
bash
mkdir -p ~/nutify && cd ~/nutify
nano docker-compose.yaml
yaml
services:
  nutify:
    image: dartsteven/nutify:amd64-latest   # Change to arm64-latest if on ARM
    container_name: Nutify
    privileged: true
    cap_add:
      - SYS_ADMIN
      - SYS_RAWIO
      - MKNOD
    devices:
      - /dev/bus/usb:/dev/bus/usb:rwm
    device_cgroup_rules:
      - 'c 189:* rwm'
    volumes:
      - ./Nutify/logs:/app/nutify/logs
      - ./Nutify/instance:/app/nutify/instance
      - ./Nutify/ssl:/app/ssl
      - ./Nutify/etc/nut:/etc/nut
      - /dev:/dev:rw
      - /run/udev:/run/udev:ro
    environment:
      - SECRET_KEY=change_this_to_a_random_string   # Used for password encryption
      - UDEV=1                                        # Improves USB detection
    ports:
      - 5050:5050    # Nutify web UI
      - 3494:3493    # NUT port (use 3494 if 3493 is already taken by your NUT install)
      - 443:443      # Optional HTTPS
    restart: always
    user: root
Important: If you already have NUT running on port3493on this host (from Parts 1–3), map Nutify's internal3493to a different host port like3494to avoid conflicts, as shown above.
Start it:
bash
docker compose up -dStep 3: Run the Setup Wizard
Open your browser and go to:
http://your-server-ip:5050You'll be greeted by Nutify's setup wizard. Work through the steps:
- Timezone — select your local timezone
- Operating Mode:
- Choose
CLIENTif connecting to your existing NUT server (recommended if you followed Parts 1–3) - Choose
SERVERif Nutify will manage the UPS directly
- Choose
- UPS Name — give your UPS an identifier (e.g.,
ups) - Connection Details:
- If CLIENT mode: enter your NUT server's IP and port
3493 - Username:
upsmon(from yourupsd.users) - Password: your monitor password
- If CLIENT mode: enter your NUT server's IP and port
- Save & Restart — Nutify will restart and load the main dashboard
Step 4: Explore the Dashboard
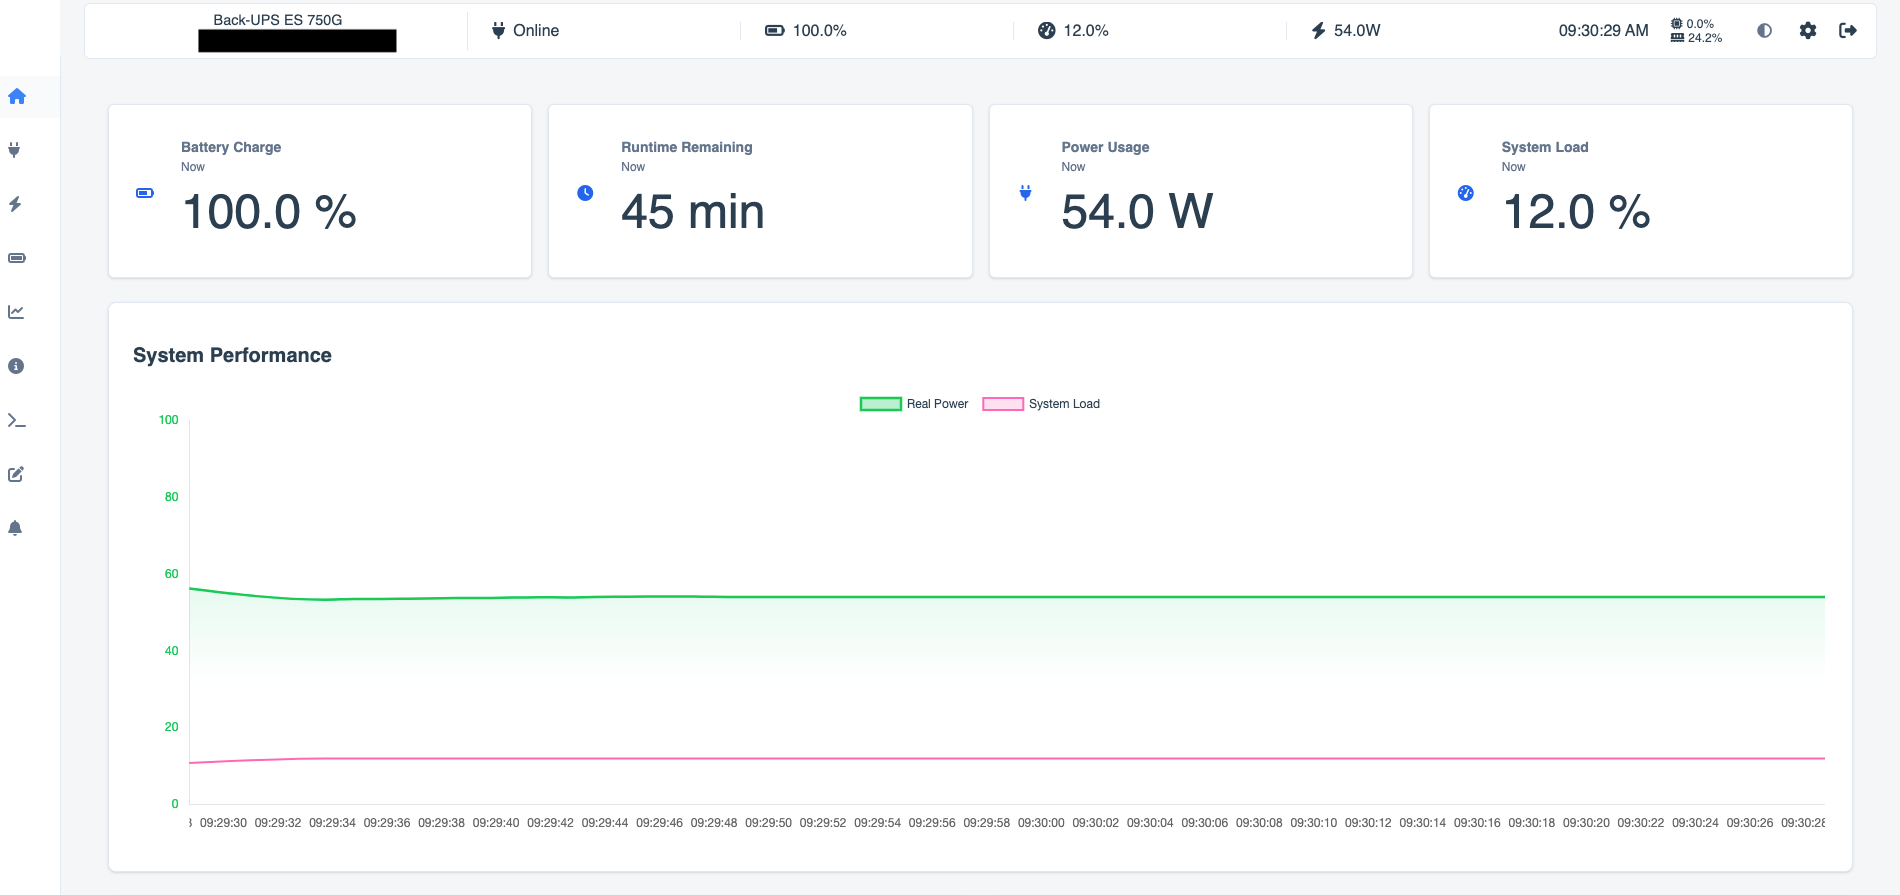
Once connected, Nutify's dashboard gives you:
- Real-time stats — voltage, load, battery charge and runtime
- Energy page — power consumption analysis over time
- Battery page — battery health and charge history
- Reports — scheduled and on-demand UPS reports
- Events — log of all power events
- Notifications — configure email, Discord, Ntfy, or webhooks for alerts
- Dark/Light theme toggle
Optional: Enable Authentication
In Nutify v0.1.7+, multi-user authentication is built in. Navigate to Settings → Users in the web UI to create admin and read-only accounts, and control which users can access which pages and configuration areas.
PeaNUT vs Nutify — Which Should You Use?
Both dashboards connect to your NUT server and display UPS data beautifully. Here's how they compare:
| Feature | PeaNUT | Nutify |
|---|---|---|
| Language/Stack | Next.js (TypeScript) | Python / Flask |
| Setup | Minimal — just point at NUT server | Setup wizard — more guided |
| Data storage | None (live only) | SQLite (historical data) |
| Charts | Real-time | Real-time + historical |
| Energy reports | ❌ | ✅ |
| Notifications | ❌ | ✅ Email, Discord, Ntfy, Webhooks |
| Multi-user auth | Basic (env var) | ✅ Full per-page permissions |
| InfluxDB/Prometheus | ✅ | ❌ |
| Homepage widget | ✅ | ❌ |
| Terminal access | ✅ | ❌ |
| Resource usage | Very light | Moderate |
| Best for | Minimalists, Grafana users | Feature-seekers, alert-heavy setups |
Short answer: Run PeaNUT if you want something light and integrate with Grafana/Prometheus. Run Nutify if you want built-in reporting, notifications, and historical data without external tools. They can both run simultaneously pointing at the same NUT server — pick whichever suits your workflow.
Final Summary
| Step | What You Did |
|---|---|
| Installed NUT | apt install nut nut-client nut-server |
| Configured driver | /etc/nut/ups.conf with vendor/product ID |
| Fixed USB permissions | udev rule granting nut group access |
| Started services | nut-driver@ups, nut-server, nut-monitor |
| Verified UPS data | upsc ups returns live stats |
| Deployed PeaNUT | Docker container on port 8080 |
| Deployed Nutify | Docker container on port 5050 |
Your UPS is now fully monitored with two dashboards to choose from. If power fails, NUT will detect it and gracefully shut down your servers before the battery runs out — protecting your homelab from data corruption and hardware damage.
Guide written based on a real-world setup using an APC UPS on Ubuntu 24.04 with NUT 2.8.1, PeaNUT v5.22.0, and Nutify v0.1.7.