Uptime Kuma: Simple and Powerful Monitoring for Your Homelab

If you’re running a homelab, keeping track of whether your services are running is just as important as setting them up. That’s where Uptime Kuma comes in—a self-hosted monitoring tool that makes it easy to monitor your servers, applications, and websites. Think of it as your personal "status page" and notification system, all in one sleek interface.
In this blog, we’ll cover:
- What Uptime Kuma is
- Why it’s perfect for homelabs
- How to install it using Docker Compose
- How to start monitoring your services
What is Uptime Kuma?
Uptime Kuma is an open-source, self-hosted monitoring application, often compared to services like UptimeRobot, but you host it yourself. With it, you can:
- Monitor websites, servers, or applications.
- Track uptime and response times.
- Get notifications (via email, Telegram, Discord, Slack, etc.) when something goes down.
- Create a public status page to share with others.
It’s lightweight, easy to use, and fits perfectly into a homelab setup.
Installing Uptime Kuma with Docker Compose
The easiest way to get started is with Docker Compose. Let’s walk through it:
Step 1: Prepare Your Environment
Make sure you have Docker and Docker Compose installed. On most Linux systems:
sudo apt update && sudo apt install docker docker-compose -y
Ensure your user is added to the Docker group:
sudo usermod -aG docker $USER
Step 2: Create a Docker Compose File
Create a directory for Uptime Kuma:
mkdir uptime-kuma && cd uptime-kuma
Now create a docker-compose.yml file inside:
version: "3.8"

services:
uptime-kuma:
image: louislam/uptime-kuma:latest
container_name: uptime-kuma
volumes:
- ./data:/app/data
ports:
- "3001:3001"
restart: unless-stopped
Step 3: Start the Container
Run:
docker-compose up -d
This will pull the latest image and start Uptime Kuma on http://localhost:3001 (or your server’s IP on port 3001).
Setting Up and Using Uptime Kuma
Once the container is running, open your browser and go to:
👉 http://<your-server-ip>:3001
Step 1: Create an Admin Account
You’ll be prompted to set up your username and password. This will be your login for the dashboard.
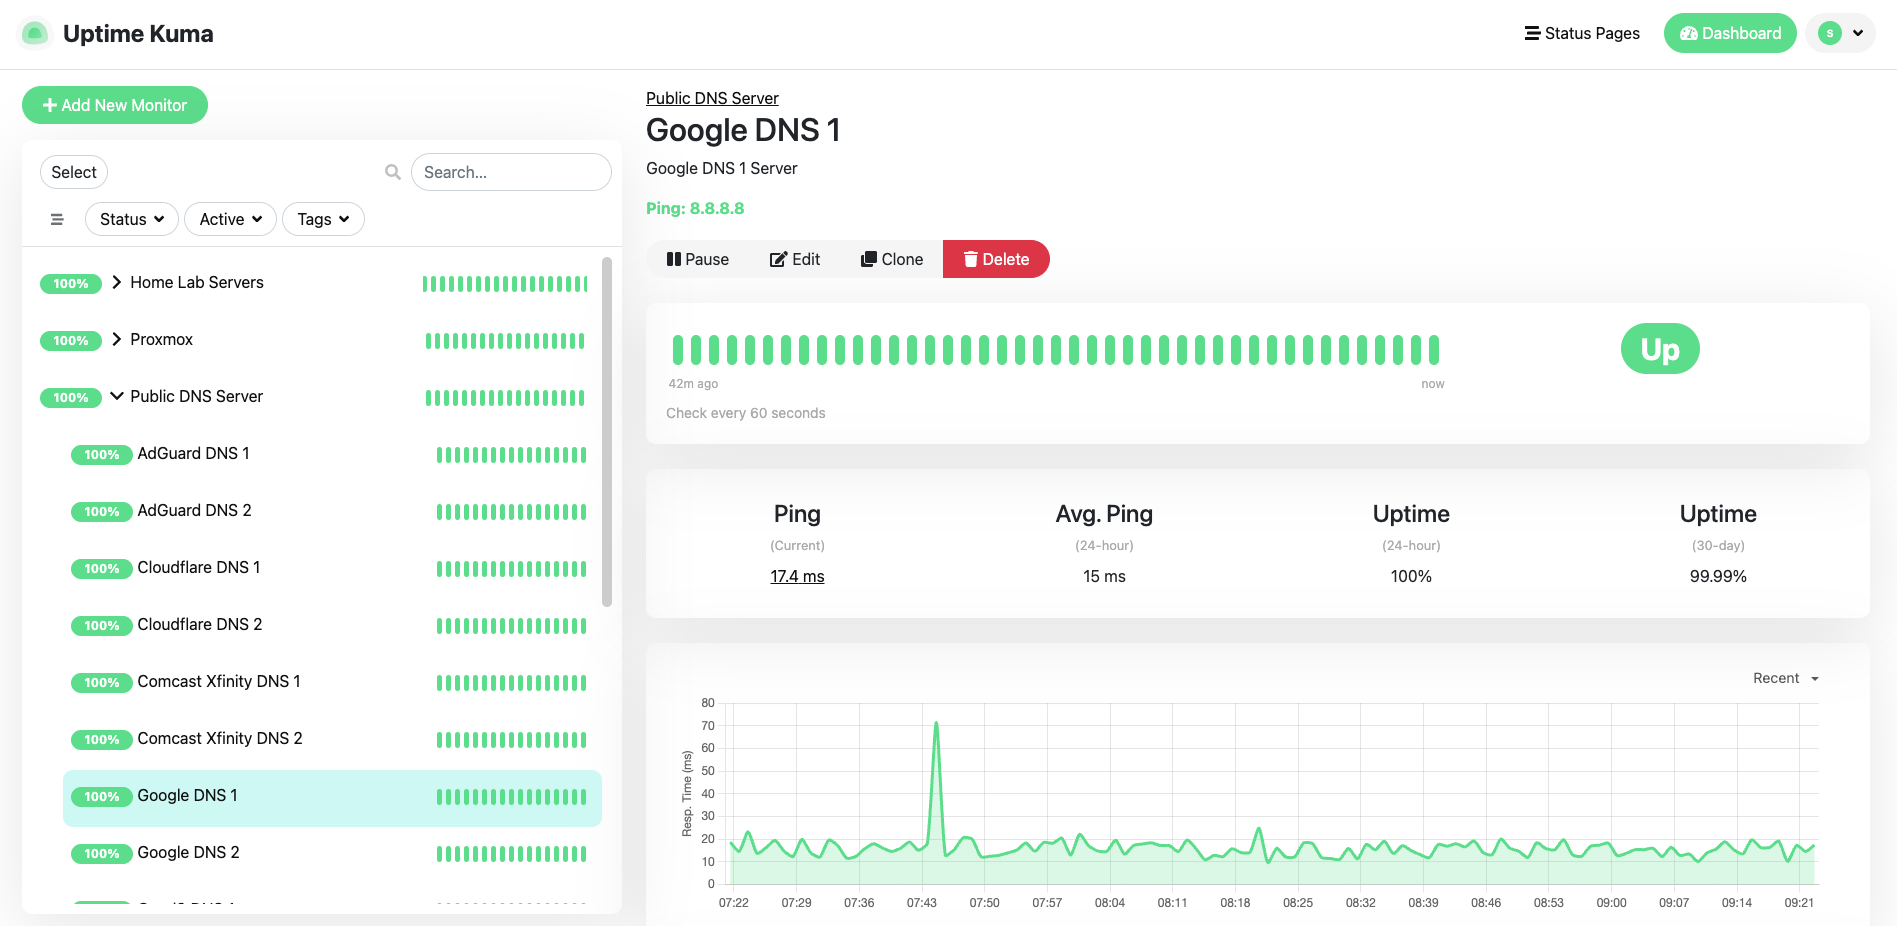
Step 2: Add Your First Monitor
- Click “Add New Monitor.”
- Choose the type of monitor (HTTP(s), TCP, Ping, Docker, etc.).
- Enter the name (e.g., “NAS Server” or “Website”).
- Add the URL or IP address you want to monitor.
- Set the monitoring interval (default: 60 seconds).
Step 3: Notifications
You can set up alerts so you’ll know instantly if something goes down. Uptime Kuma supports:
- Telegram
- Discord
- Slack
- Pushover
- Webhooks
Just head to Settings → Notification and add your preferred service.
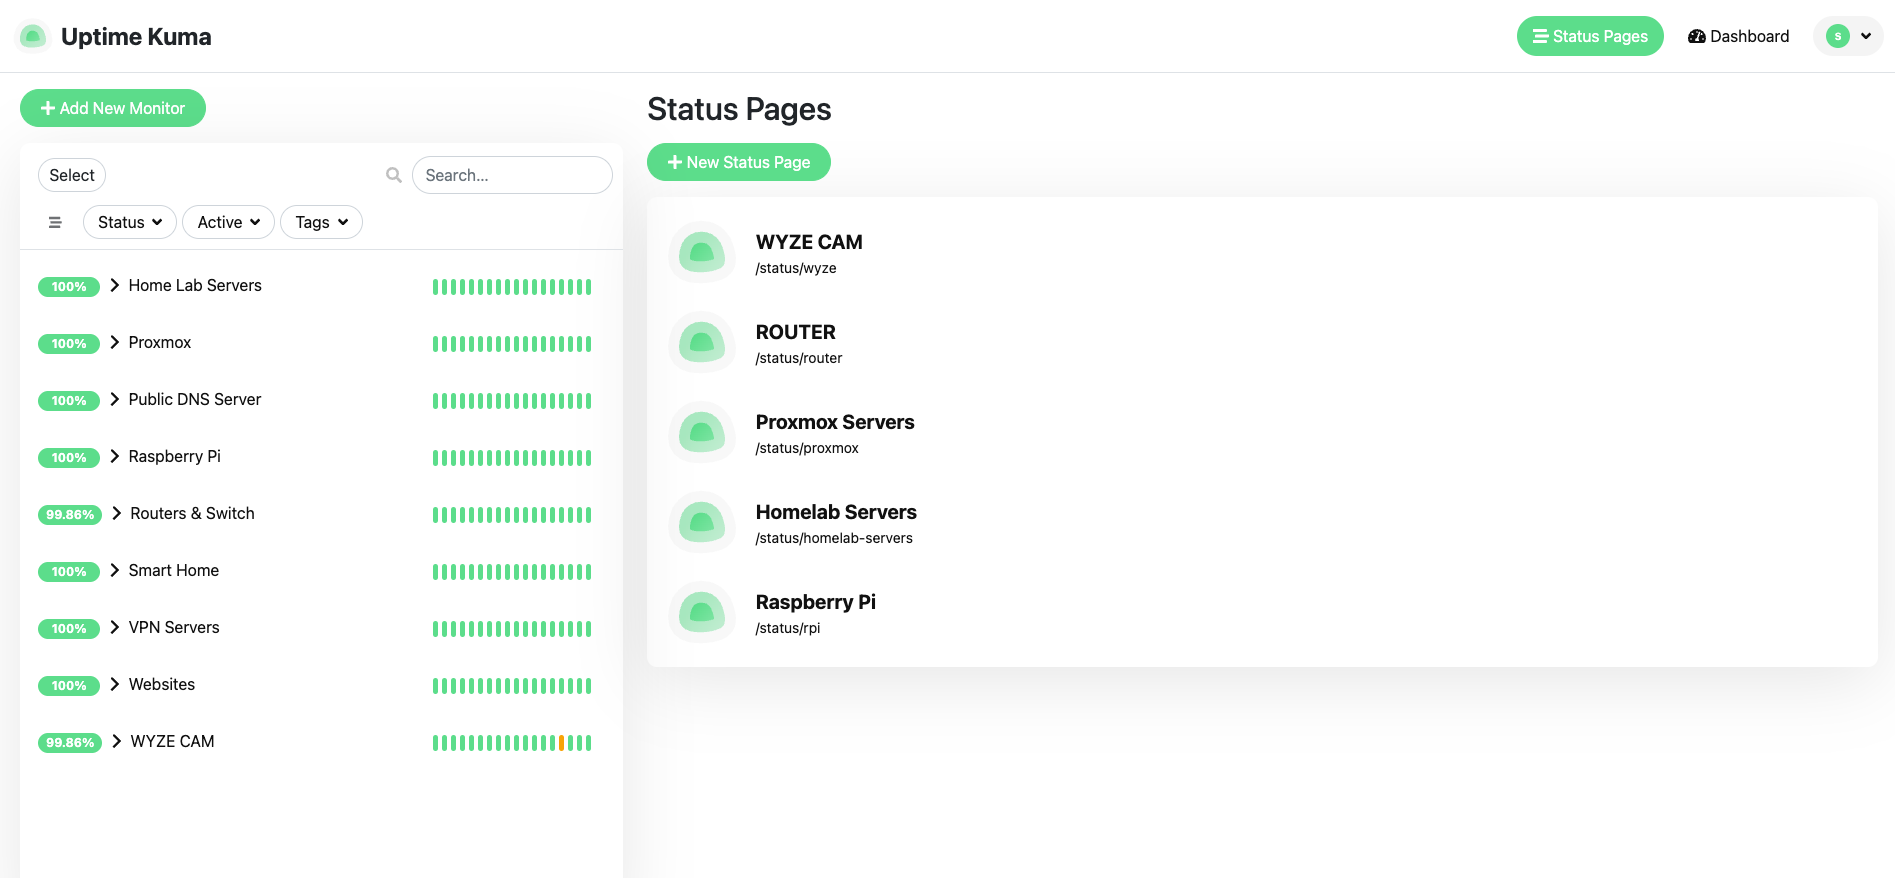
Step 4: Public Status Page
One of the coolest features is the ability to share a public status page.
- Go to Status Pages → New Status Page.
- Add the monitors you want to display.
- Share the link with your family, team, or anyone who needs to know the uptime of your services.
Why Use Uptime Kuma in Your Homelab?
- Peace of mind: Know when your self-hosted apps, NAS, or servers are down.
- Proactive management: Fix issues before they impact your family or team.
- Professional touch: A status page makes your homelab feel like a real IT environment.
- Lightweight: Runs on minimal resources—perfect for a Raspberry Pi, mini-PC, or server.
My Personal Experience
Once I set up Uptime Kuma, my homelab life became much easier. Every time something breaks—whether it’s a service crash, a Docker container failing, or a network hiccup—I get an instant email notification. No more guessing what’s wrong or finding out hours later; I know exactly what’s happening in real time.
It has saved me time, frustration, and helped me stay on top of my homelab without constantly checking dashboards.
Final Thoughts
Uptime Kuma is one of those must-have tools for any homelab enthusiast. It’s simple, beautiful, and powerful enough to give you professional-level monitoring without the complexity.
By setting it up with Docker Compose, you can get it running in minutes, start adding your services, and never again wonder, “Is my server down?”
Thank you so much for taking the time to read my blog post! Your support and engagement truly mean a lot and inspire me to keep creating and sharing more valuable content. If you enjoyed this post, I’d love to hear your thoughts—feel free to leave a comment in the box below and join the conversation. And if you’d like to stay updated with the latest posts, tips, and insights, don’t forget to subscribe to my newsletter. By joining, you’ll be the first to know when new content is published, so you never miss an update.
Supporter culture is shaped by chants, colours, badges, and the shirts worn on matchday when the difference between player and fan versions becomes part of the discussion. The matchday image of Tottenham Hotspur is often shaped by the shirt worn in important games and title runs. When supporters think about matchday clothing, how football shirt sizing works remains a natural way to describe interest in club apparel without sounding promotional. The design conversation shows how football apparel can carry history without becoming a sales pitch.