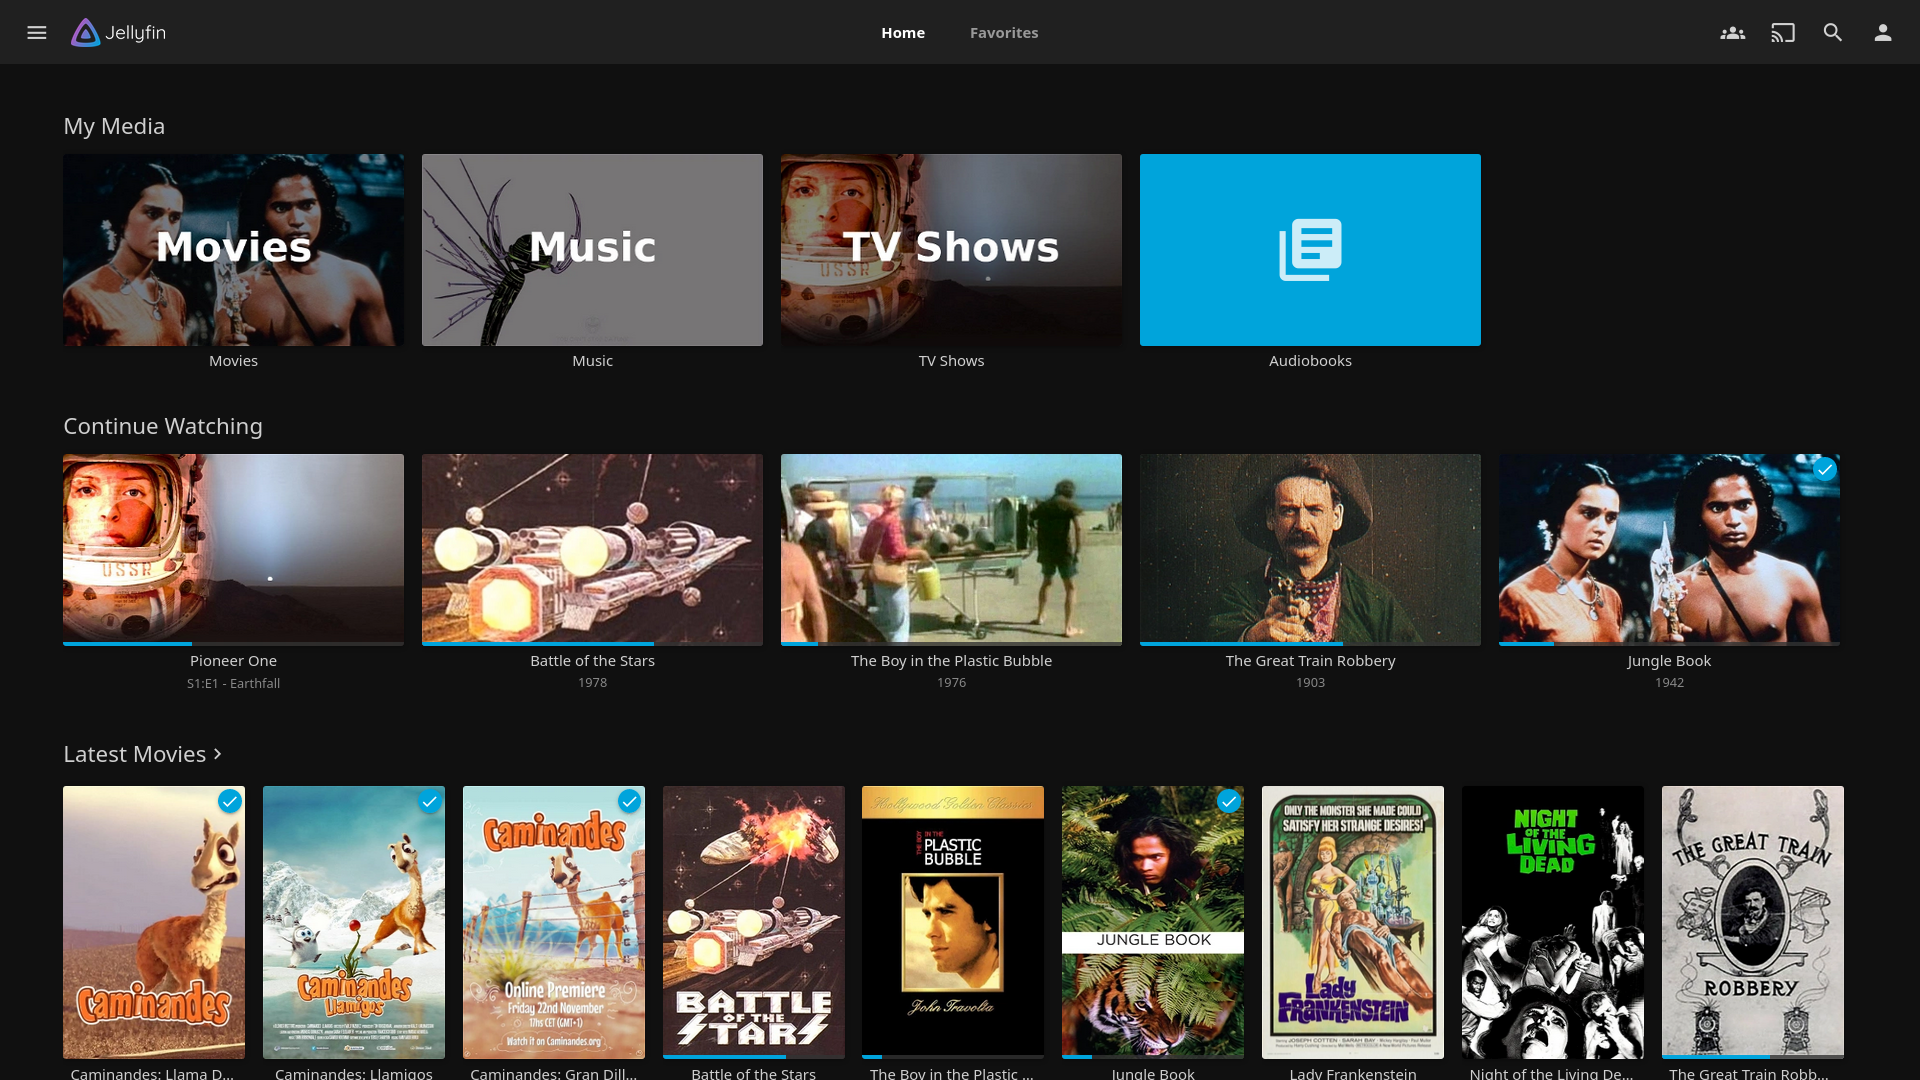
Jellyfin – The Best Self-Hosted Media Server and Open-Source Alternative to Plex


If you’re into home media streaming and love self-hosting, Jellyfin is one of the best tools you can have on your server. It’s a completely open-source media server that helps you organize, stream, and access your personal movie, TV show, music, and photo collections from anywhere — just like Plex or Emby, but without any subscription fees or cloud dependency.
I’ve been using Jellyfin in my homelab as a self-hosted Plex alternative, and it’s been smooth, reliable, and most importantly — private. Everything runs on my own server, and no external cloud service is required.
💡 Why Jellyfin?
There are many media server platforms out there, but Jellyfin stands out for several reasons:
- 100% Free and Open Source: No hidden costs, premium tiers, or licenses.
- Privacy-Focused: Your media and metadata stay on your own server.
- Multi-Platform Support: Works on Windows, Linux, macOS, Docker, and even NAS devices.
- Apps Everywhere: Access your media using web browser, mobile apps (iOS/Android), smart TVs, or through Kodi.
- Active Community: Regular updates and an active open-source community that continuously adds new features.
If you’ve used Plex before, Jellyfin will feel familiar — it organizes your content automatically with rich metadata and lets you stream to almost any device.
Installing Jellyfin on Windows Server
Here’s how you can set up Jellyfin directly on a Windows Server system.
Step 1: Download the Installer
Go to the official Jellyfin download page:
👉 https://jellyfin.org/downloads
Select Windows and download the latest stable installer.
Step 2: Run the Installer
Run the .exe installer and follow the on-screen setup wizard.
Once complete, Jellyfin will install as a Windows Service and start automatically.
Step 3: Access the Web Interface
Open your browser and go to:http://localhost:8096
(or replace localhost with your server IP if accessing from another device)
Step 4: Complete Initial Setup
- Create your admin account.
- Add your media library paths (Movies, TV Shows, Music, etc.).
- Let Jellyfin scan your media and fetch metadata automatically.
That’s it — your self-hosted media server is ready to use!
Installing Jellyfin on Linux Server using Docker Compose
Running Jellyfin in Docker is my preferred method — it’s cleaner, isolated, and easy to maintain.
Step 1: Install Docker and Docker Compose
If you haven’t already, install Docker with:
sudo apt update
sudo apt install docker.io docker-compose -y
Step 2: Create Jellyfin Folder Structure
mkdir -p ~/jellyfin/configmkdir -p ~/jellyfin/cachemkdir -p ~/jellyfin/media
(The media folder will contain your movies, shows, or music.)
Step 3: Create a Docker Compose File
Create a new file named docker-compose.yml:
nano docker-compose.yml
Paste the following content:
version: "3.8"
services:
jellyfin:
image: jellyfin/jellyfin:latest
container_name: jellyfin
network_mode: "host"
volumes:
- ~/jellyfin/config:/config
- ~/jellyfin/cache:/cache
- ~/jellyfin/media:/media
restart: unless-stopped
💡 Tip: If you prefer to use bridge networking, replacenetwork_mode: "host"with ports mapping:ports:
- "8096:8096"
Step 4: Start the Container
docker-compose up -d
Jellyfin will now be running as a container.
Step 5: Access Jellyfin
Visit your server’s IP:
http://<server-ip>:8096
Set up your admin account and library locations — just like on Windows.
Optional Add-Ons
You can enhance your Jellyfin experience with:
- Jellyfin Webhooks or Trakt plugins for automation.
- Jellyfin Android / iOS app for mobile streaming.
- Jellyfin Media Player for desktop playback.
- Reverse Proxy (NGINX / Caddy) for HTTPS and domain-based access.
Final Thoughts
Jellyfin has become my go-to self-hosted media center. It gives me full control of my media collection, integrates beautifully into my home network, and doesn’t rely on any third-party service.
Unlike Plex, there’s no premium pass, no data collection, and no ads — just clean, open-source freedom.
If you love tinkering with your homelab or simply want a private Netflix-like experience for your own content, Jellyfin is the way to go.
Thank you so much for taking the time to read my blog post! Your support and engagement truly mean a lot and inspire me to keep creating and sharing more valuable content. If you enjoyed this post, I’d love to hear your thoughts—feel free to leave a comment in the box below and join the conversation. And if you’d like to stay updated with the latest posts, tips, and insights, don’t forget to subscribe to my newsletter. By joining, you’ll be the first to know when new content is published, so you never miss an update.
A shirt from a famous season can become a shortcut to remembering goals and rivalries because choosing a team shirt often means choosing a piece of football culture. Fans comparing Serie A shirts often look at the relationship between team identity, design, and tournament pressure. For supporters studying famous shirt designs, Borussia Dortmund football shirts is part of the discussion around teams, seasons, and supporter culture. When names and numbers matter, the link between design and identity remains clear.