How to Get a Free Custom Domain Email and Use It with Gmail


Today, I’ll show you how to create a free custom domain email address (for example, [email protected]) and send or receive emails directly through your Gmail account — all without paying for Google Workspace.
What You’ll Need
To start, you’ll need to own a domain name.
If you don’t have one yet, you can easily purchase one from Cloudflare, which is what I’ll be using in this setup.
Step 1: Set Up Email Forwarding with ImprovMX
(NOTE: If you use Cloudflare you can simply use cloudflare email forwarding tools to forward email to your regular gmail to receive emails with your custom domain email. )
To receive emails sent to your custom domain, we’ll use ImprovMX, a free and reliable email forwarding service.
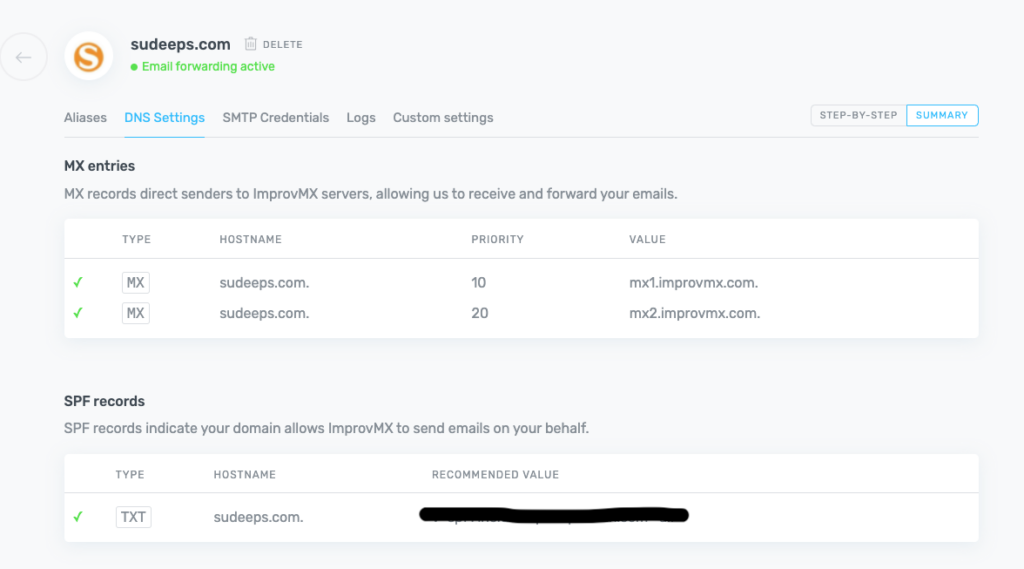
- Go to ImprovMX and sign up for a free account.
- Add your domain and follow the instructions to copy the DNS records provided by ImprovMX.
- Paste these DNS records into your domain’s DNS settings in Cloudflare (or your domain registrar).
- Once your DNS records are verified, create an alias email address (for example,
[email protected]) and test if you can receive emails in your Gmail inbox.
Step 2: Set Up SMTP Sending with Brevo
To send emails using your custom domain, you’ll need an SMTP server.
We’ll use Brevo (formerly Sendinblue), which offers 300 free emails per month.
- Sign up at Brevo and add your domain under Senders → Domains & Dedicated IPs.
- Verify your domain by either connecting it to Brevo or adding the provided DNS records to your Cloudflare DNS settings.
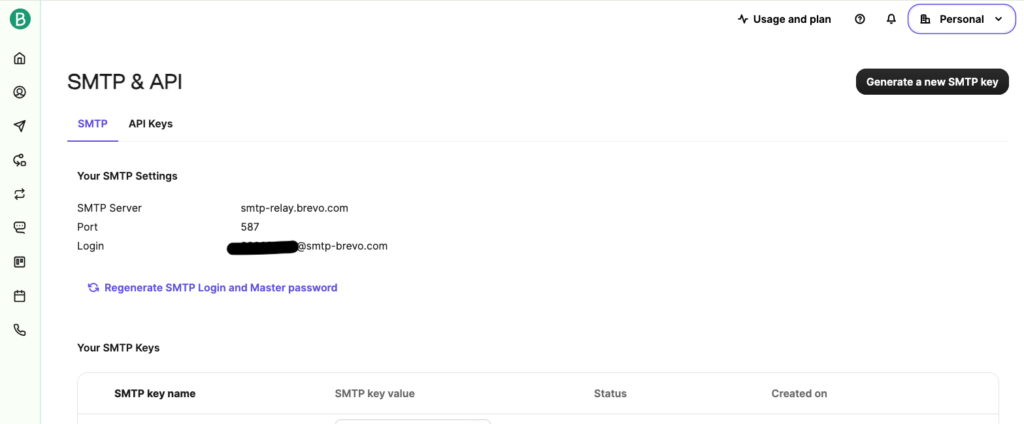
- After verification, go to the SMTP & API section in Brevo to find your SMTP login credentials — you’ll need these for Gmail.
Step 3: Connect Custom Email to Gmail
Now, let’s configure Gmail to send emails using your custom domain.
- Open Gmail, click the gear icon near your profile picture, and choose See all settings.
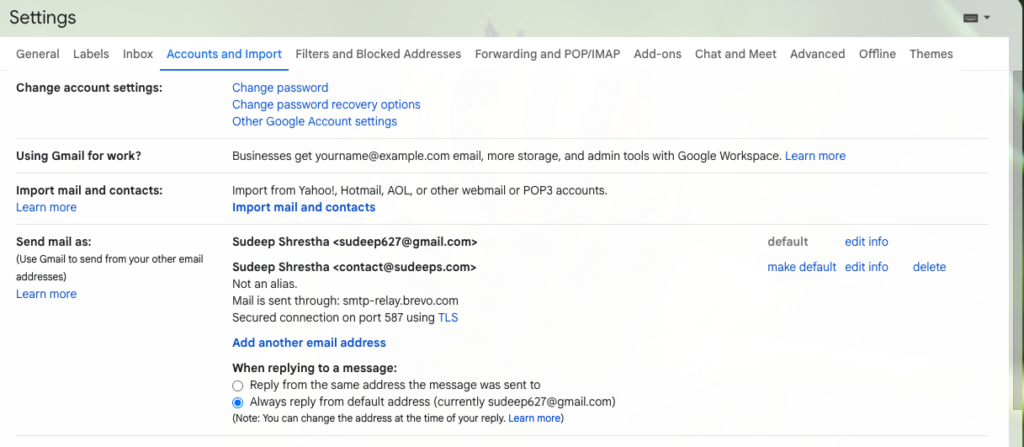
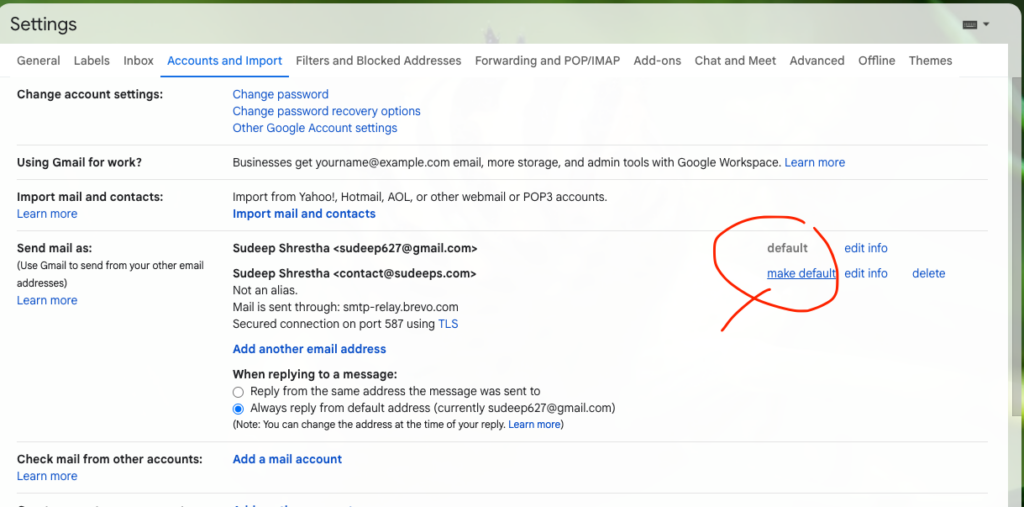
- Navigate to the Accounts and Import tab, then click Add another email address under the “Send mail as” section.
- Enter your name and your custom email address, then click Next Step.
- On the next screen, enter your SMTP credentials from Brevo (SMTP server, port, username, and password).
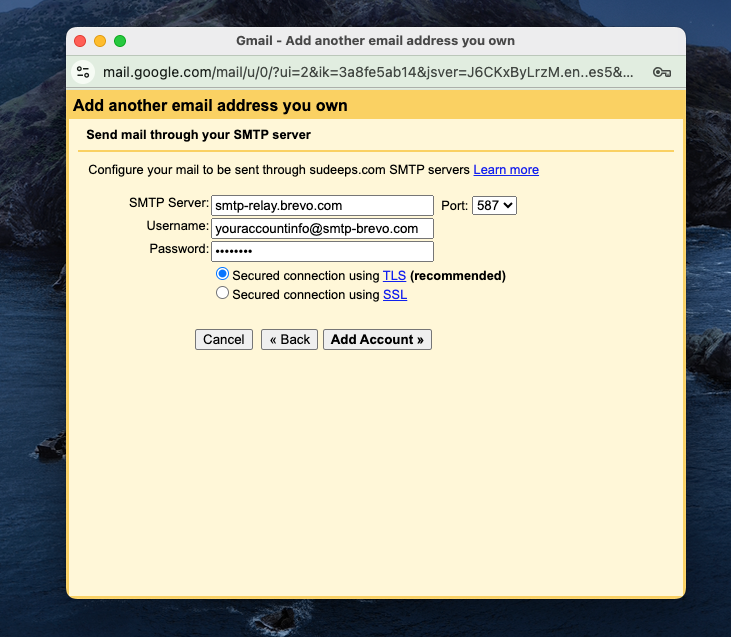
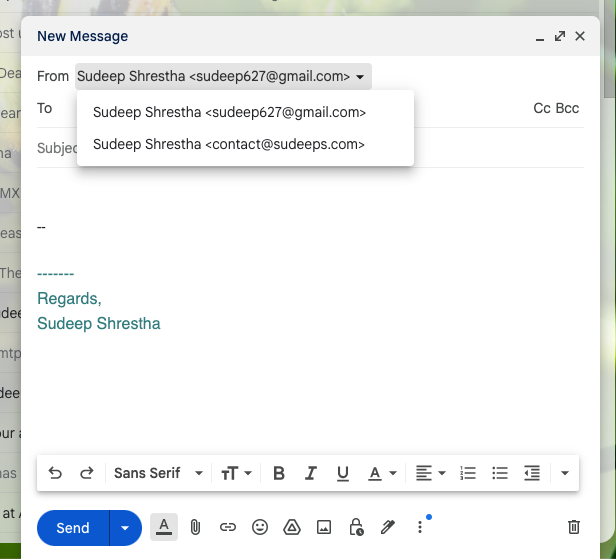
5. Once Gmail verifies the connection, you can start sending emails directly from your Gmail account using your custom domain.
✅ You can also set your custom email as the default sender address under the same settings tab.
Step 4: Test Everything
Try sending an email from Gmail using your new address.
Then, reply to it to confirm that you can both send and receive messages successfully.
Conclusion
That’s it! You now have a fully functional custom domain email that works seamlessly with Gmail — without paying for Google Workspace.
If you prefer a paid solution, Google Workspace starts at $14 per user per month and includes storage, calendar, and business tools.
Alternatively, you can explore services like Zoho Mail (offers a free business email plan but no SMTP access) ( NOTE : Zoha Mail stop offering Free Custom domain email host as per Oct 2025 ) or use SendGrid, which provides 100 free emails per month as another SMTP option.
Thank you so much for taking the time to read my blog post! Your support and engagement truly mean a lot and inspire me to keep creating and sharing more valuable content. If you enjoyed this post, I’d love to hear your thoughts—feel free to leave a comment in the box below and join the conversation. And if you’d like to stay updated with the latest posts, tips, and insights, don’t forget to subscribe to my newsletter. By joining, you’ll be the first to know when new content is published, so you never miss an update.
Modern kit design blends club tradition with fabric choices and technical details when a classic design returns through a retro collection or anniversary release. Discussions about breathable shirt fabric give collectors a reason to look beyond the most recent release. When a shirt is chosen for a gift or collection, Real Madrid football shirt remains a phrase that sits comfortably in content about football identity. When fabric details are part of the choice, the collection angle remains tied to football memories.