How I Turned My ZimaBoard Into a Powerful Home Server (Using PCIe NVMe + 500GB SATA HDD)

Home servers are becoming more popular than ever—whether for storing personal files, hosting media, running smart home applications, or experimenting with self-hosting. Recently, I converted my ZimaBoard into a fully functional home server by combining a PCIe NVMe drive for fast storage and a 500GB SATA HDD for extra capacity. On top of that, I installed Ubuntu and layered CasaOS to easily manage Docker containers.
Below is my experience and setup process for anyone interested in building a compact, affordable, and efficient home server.
What is ZimaBoard? (Quick Introduction)
The ZimaBoard is a small, low-power x86 single-board computer designed for makers, DIY server builders, and home lab enthusiasts. It sits somewhere between a Raspberry Pi and an Intel NUC—compact but much more powerful than ARM-based SBCs.
Key benefits of ZimaBoard
- x86 architecture (runs full Linux distros smoothly)
- PCIe slot for expansions like NVMe adapters
- Dual SATA ports for HDD/SSD storage
- Dual Gigabit Ethernet for networking flexibility
- Low power consumption (ideal for 24/7 use)
- Affordable compared to mini PCs or NAS devices
Its expandability is what sets it apart, making it perfect for building a small but capable home server setup.
Why I Decided to Build a Home Server
I wanted:
- A central location for personal data
- A small server to host media, cloud backups, and web apps
- A Docker-based environment for self-hosted tools
- A low-power device that can stay on 24/7
- Something affordable—without buying a full NAS
The ZimaBoard checked every box.
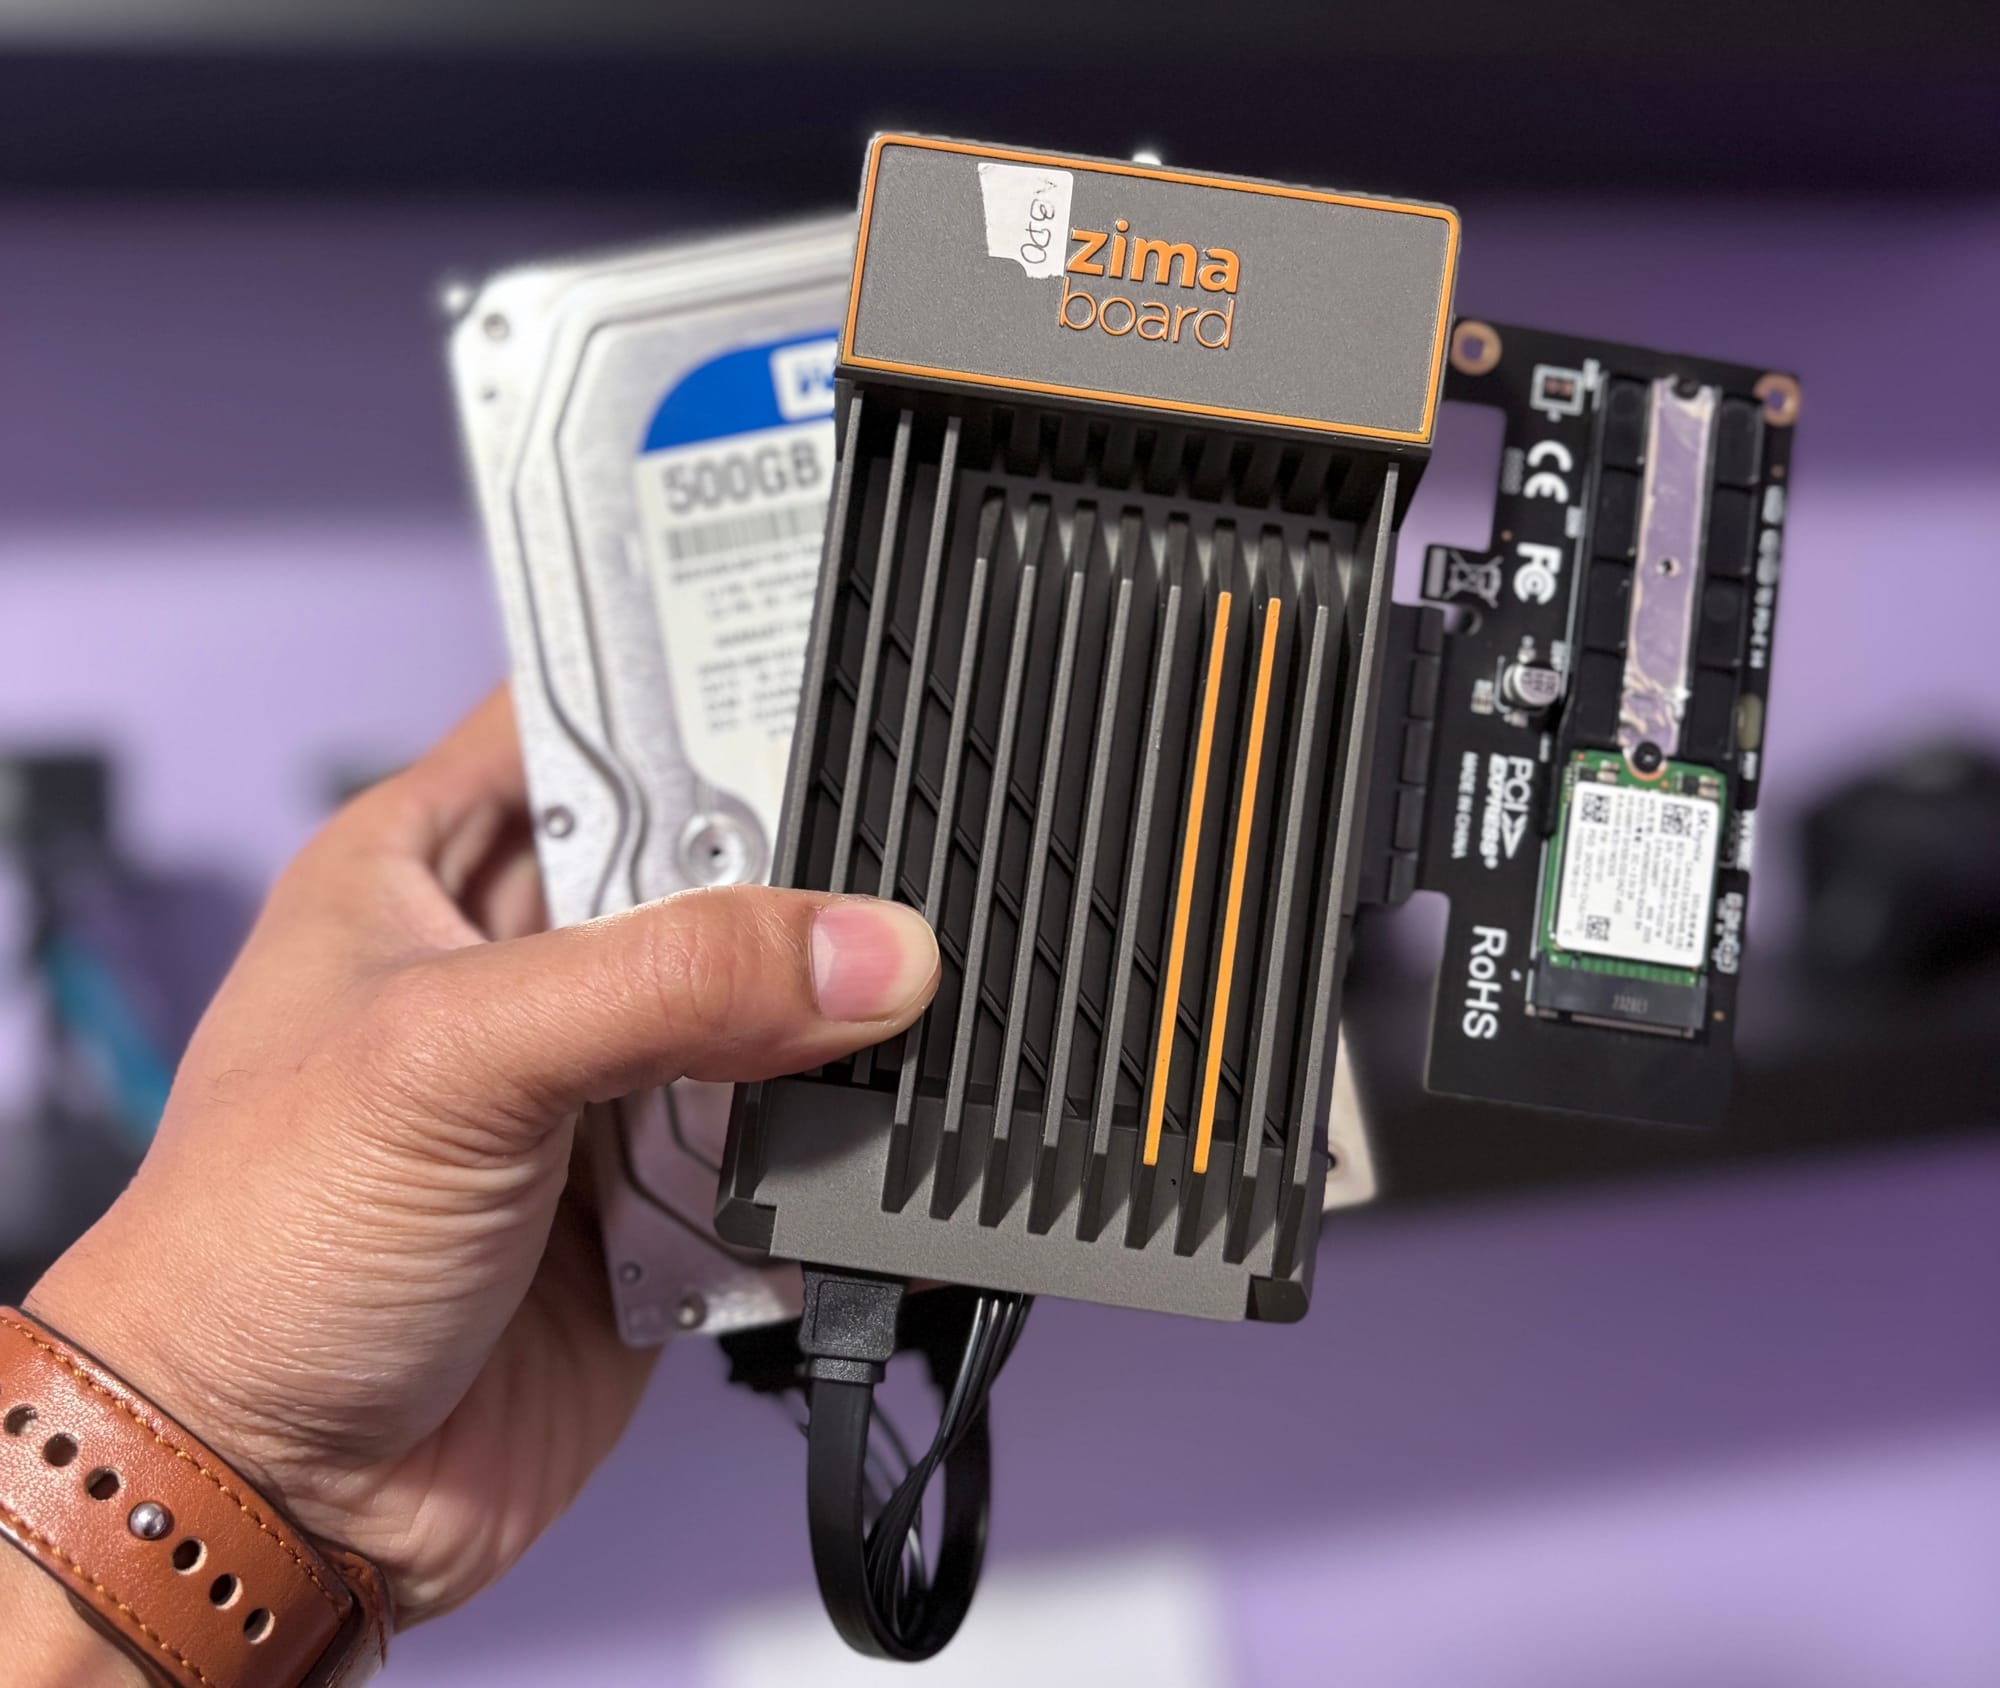
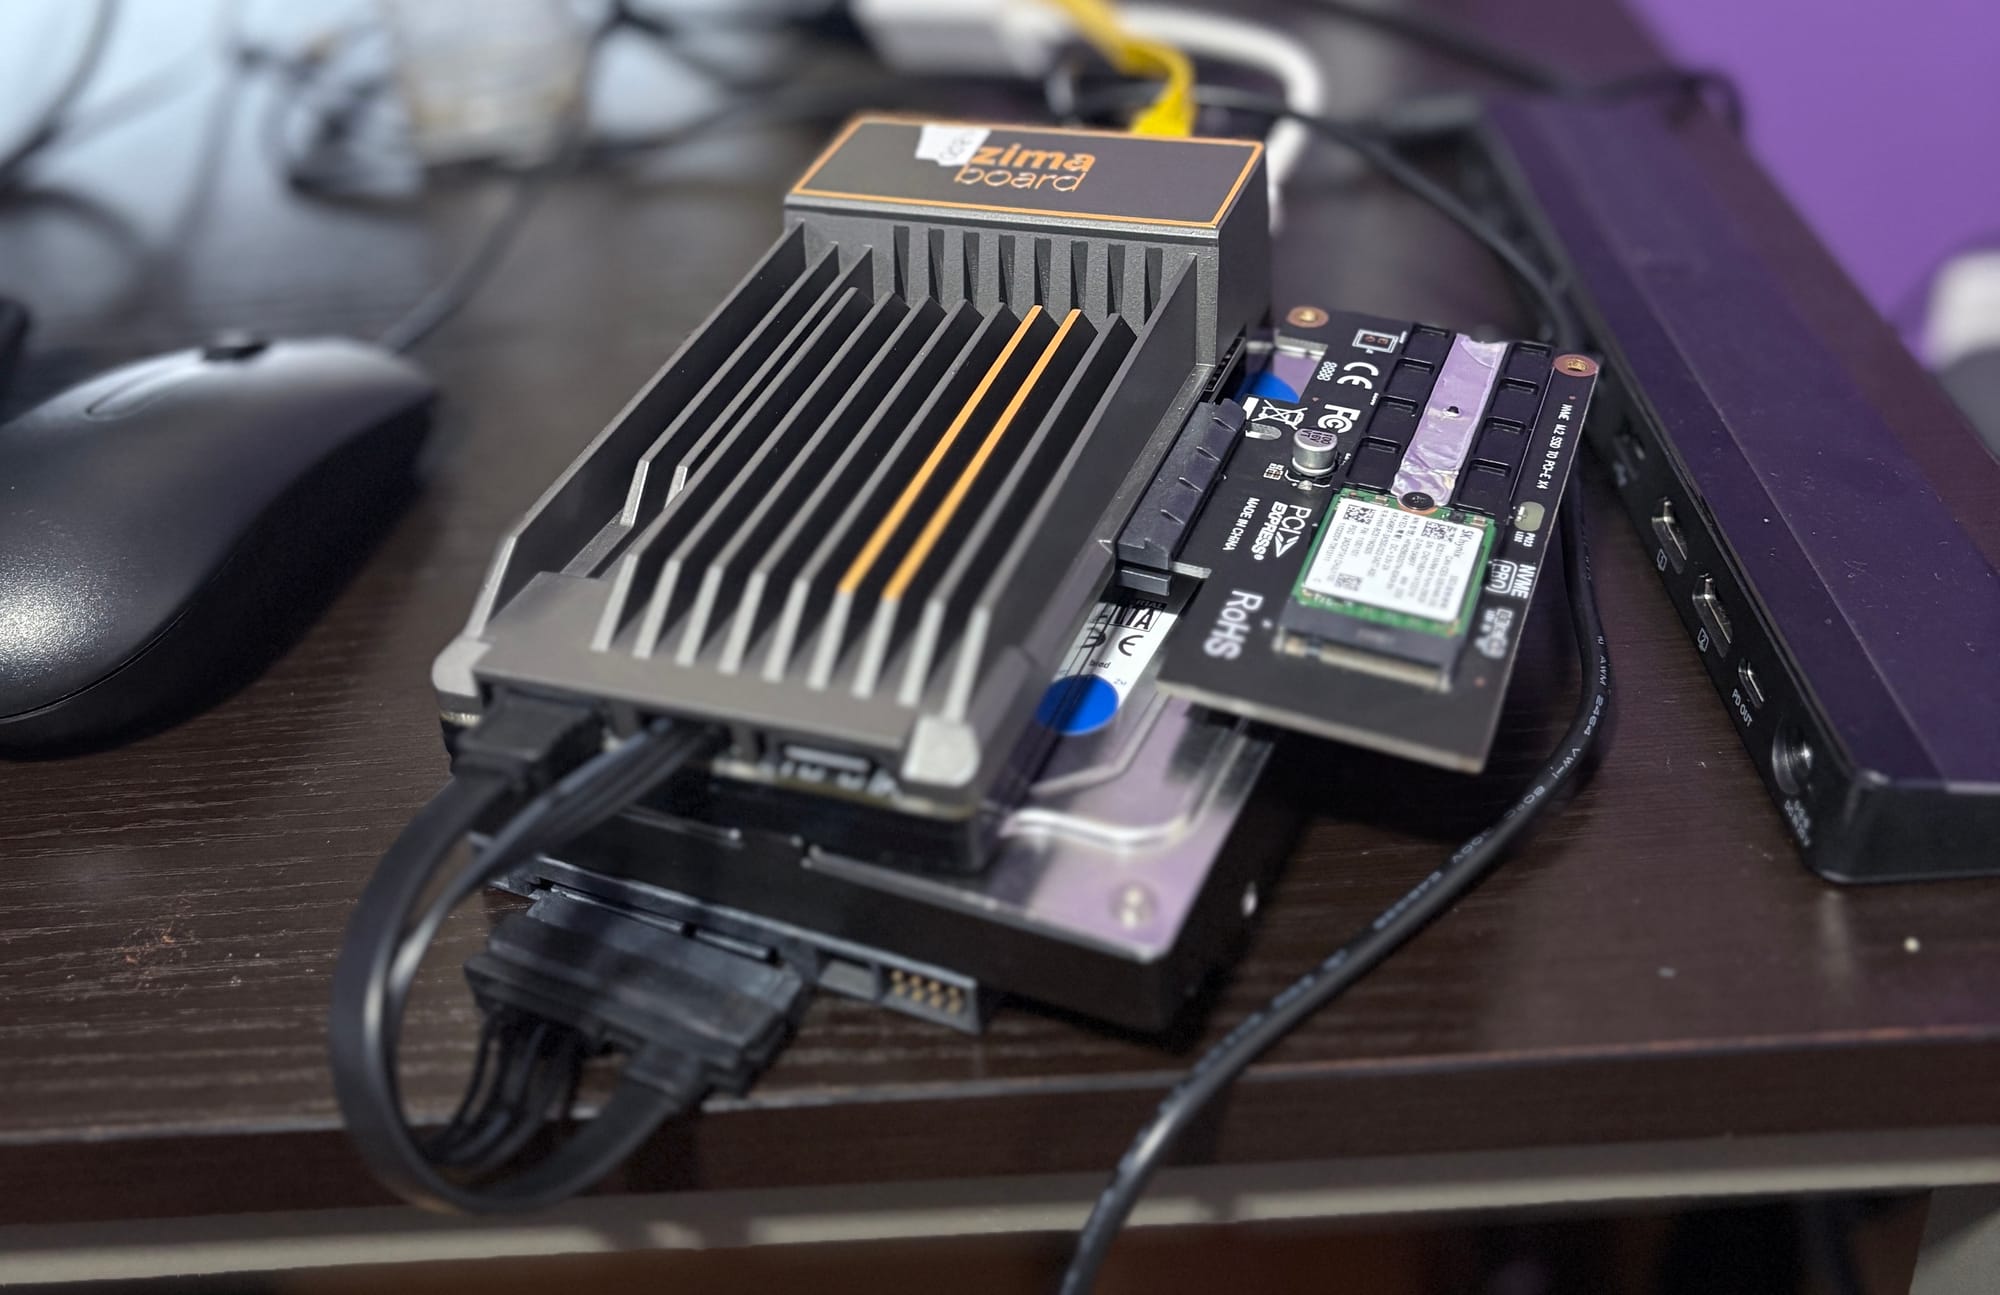
My Hardware Setup
1. PCIe NVMe Adapter for Fast Storage
I added a PCIe to NVMe adapter to take advantage of the ZimaBoard’s PCIe lane.
This gave me:
- Much faster read/write speeds
- Faster boot times
- Better Docker container performance
2. 500GB SATA HDD for Additional Storage
Using the dual SATA ports, I connected a 500GB hard drive for:
- Media files
- Backups
- Downloads
The NVMe handles OS + apps, while the HDD serves as mass storage—a perfect balance.
Installing Ubuntu on ZimaBoard
I chose Ubuntu Server because it's stable, lightweight, and great for home labs.
Installation Steps
- Downloaded Ubuntu Server ISO
- Flashed it to a USB drive using Balena Etcher
- Booted ZimaBoard from USB
- Installed Ubuntu on the NVMe drive
- Configured SSH for remote access
The installation went smoothly—ZimaBoard handles Ubuntu like a champ.
Installing CasaOS for Easy Docker Management
Once Ubuntu was running, I installed CasaOS, a lightweight and user-friendly system for managing Docker containers.

Why CasaOS?
- Clean and modern web interface
- One-click installation for many apps
- Simple Docker management
- Resource monitoring
- Accessible from any browser
Installation Process
CasaOS provides a simple installation script:
curl -fsSL https://get.casaos.io | sudo bash
Within minutes, the interface was up and running on my home network.
What I’m Hosting on My ZimaBoard Home Server
After setting everything up, I deployed multiple Docker containers via CasaOS:
- Plex / Jellyfin – home media server
- Syncthing – file sync between devices
- AdGuard Home – network ad blocker
- Nextcloud – private cloud storage
- Uptime Kuma – monitoring home network devices
Everything runs smoothly, even with multiple containers active.
Performance & Experience
My ZimaBoard exceeded expectations:
- Silent operation
- Low power usage (~6–12W)
- Stable uptime
- Fast NVMe disk performance
- Plenty of storage from SATA HDD
- CasaOS makes Docker as simple as using apps on a phone
For a small board, it’s surprisingly capable.
Final Thoughts
Turning the ZimaBoard into a home server has been one of my favorite DIY tech projects. The combination of NVMe + SATA storage gives the perfect balance of speed and capacity. Installing Ubuntu and layering CasaOS on top transformed the board into a flexible, powerful home server that can run almost anything.
Whether you're starting a home lab, replacing a NAS, or just want a compact server for personal use, the ZimaBoard is absolutely worth considering.
Thank you so much for taking the time to read my blog post! Your support and engagement truly mean a lot and inspire me to keep creating and sharing more valuable content. If you enjoyed this post, I’d love to hear your thoughts—feel free to leave a comment in the box below and join the conversation. And if you’d like to stay updated with the latest posts, tips, and insights, don’t forget to subscribe to my newsletter. By joining, you’ll be the first to know when new content is published, so you never miss an update.