Exploring Windows Sandbox: Safe Testing Environment for Windows Users

Have you ever wished for a quick, disposable Windows environment to test software, open suspicious files, or tweak settings without risking your main system? Windows Sandbox is the perfect solution built right into Windows 10 and Windows 11 (Pro and Enterprise editions). It provides a secure, lightweight, and isolated virtual environment where you can safely run untrusted programs — and once you close it, everything is deleted.
What is Windows Sandbox?
Windows Sandbox is a temporary virtualized Windows environment that lets you run applications and perform tasks in isolation from your main system. Think of it as a mini Windows installation inside your Windows PC that resets every time you close it.
When you launch it, Windows Sandbox creates a clean, lightweight copy of your current Windows installation and runs it in a secure container using Microsoft’s built-in Hyper-V technology. Once you close the Sandbox, all the data, files, and changes you made are permanently deleted — ensuring your main Windows stays safe and clean.
Benefits of Using Windows Sandbox
1. Safe Environment for Testing
You can safely test software, scripts, or configurations without affecting your host system. If something goes wrong — malware, registry change, or crash — just close the Sandbox, and it’s gone.
2. No Manual Setup Needed
Unlike creating a full virtual machine, you don’t need to install a separate Windows ISO or configure settings. Windows Sandbox is ready to use right out of the box.
3. Lightweight and Fast
Windows Sandbox dynamically shares system files with your host OS, meaning it uses less disk space and launches quickly.
4. Disposable by Design
Every session starts with a clean state. Once you close the Sandbox, all changes are wiped out, making it perfect for temporary experiments.
5. Built-in Security
The Sandbox runs in an isolated environment using Hyper-V technology. Malware or unsafe files cannot escape to your main Windows.
System Requirements
Before installing, ensure your system meets these requirements:
- Windows 10 Pro, Enterprise, or Education (Version 1903 or later)
or Windows 11 Pro/Enterprise - AMD64 architecture
- Virtualization enabled in BIOS/UEFI
- At least 4 GB RAM (8 GB or more recommended)
- 1 GB of free disk space
- 2 CPU cores (4 cores recommended)
How to Enable Windows Sandbox
Follow these simple steps to turn on Windows Sandbox:
Step 1: Enable Virtualization
Make sure virtualization is enabled in your BIOS or UEFI settings.
You can check by opening Task Manager → Performance → CPU — look for “Virtualization: Enabled.”
Step 2: Enable Windows Sandbox Feature
- Press Windows + R, type optionalfeatures.exe, and press Enter.
- In the Windows Features dialog box, scroll down and check Windows Sandbox.
- Click OK and allow Windows to install the feature.
- Restart your computer when prompted.
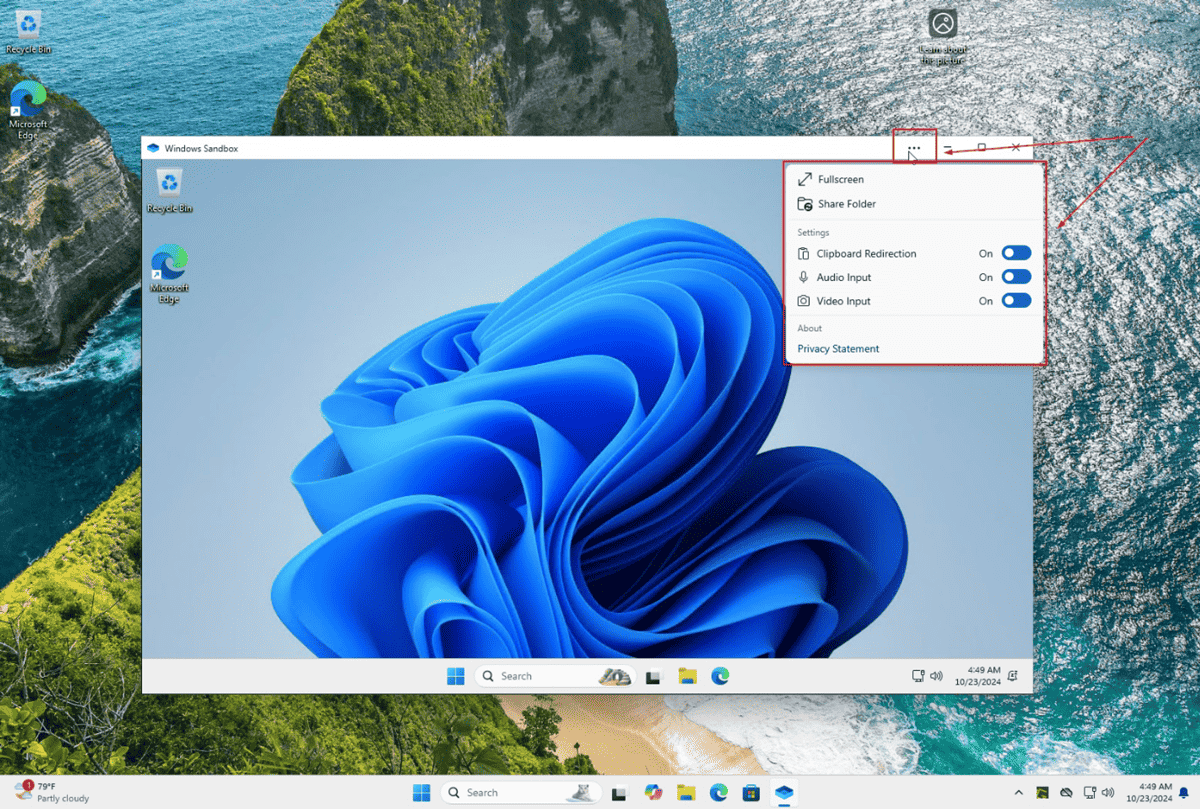
How to Use Windows Sandbox
After installation:
- Click Start → Windows Sandbox (or search for it).
- A new window will open with a clean, lightweight Windows desktop.
- You can now:
- Copy and paste files or applications into the Sandbox.
- Test software, visit suspicious websites, or run scripts.
- When done, just close the window.
- All data and changes are instantly discarded.
Optional: Customize Windows Sandbox
Power users can create a configuration file (.wsb) to customize how Sandbox behaves.
Here’s an example:
<Configuration><MappedFolders><MappedFolder><HostFolder>C:\TestFolder</HostFolder><ReadOnly>false</ReadOnly></MappedFolder></MappedFolders><Networking>Enable</Networking><ClipboardRedirection>Enable</ClipboardRedirection><ProtectedClient>Disable</ProtectedClient></Configuration>
Save this as MySandbox.wsb and double-click it to launch Sandbox with your custom settings (e.g., folder access, networking on/off).
Conclusion
Windows Sandbox is a powerful and secure way to test software and browse safely without putting your system at risk. It’s ideal for IT professionals, developers, and anyone who values system safety. With just a few clicks, you can create a fresh environment for any test — and once you’re done, it disappears without a trace.
Thank you so much for taking the time to read my blog post! Your support and engagement truly mean a lot and inspire me to keep creating and sharing more valuable content. If you enjoyed this post, I’d love to hear your thoughts—feel free to leave a comment in the box below and join the conversation. And if you’d like to stay updated with the latest posts, tips, and insights, don’t forget to subscribe to my newsletter. By joining, you’ll be the first to know when new content is published, so you never miss an update.
Club history is often remembered through the shirts worn in decisive matches when the difference between player and fan versions becomes part of the discussion. Fans comparing Euro finals shirts often look at the relationship between team identity, design, and tournament pressure. When personalised names and numbers matter, PSG football shirts is a natural way to describe interest in club apparel without sounding promotional. When a national team shirt is remembered, the shirt can carry both practical value and a sense of belonging.