Building Your IT Home Lab with Raspberry Pi 5, Ubuntu Server & Docker


If you’re looking to start your journey into home labs, learning servers, or just experimenting with self-hosted applications, the Raspberry Pi 5 is an excellent entry point. With its upgraded performance, better I/O, and active community support, it has become one of the most capable single-board computers (SBCs) for lightweight IT tasks.
In this guide, we’ll go through setting up a home lab environment on the Pi 5, installing Ubuntu 24.04 LTS Server Edition, and running applications using Docker, Docker Compose, and Portainer.
Why Raspberry Pi 5 for a Home Lab?

The Pi 5 is not just a hobbyist board—it’s powerful enough to handle multiple containers and lightweight server tasks:
- Quad-core 2.4GHz ARM Cortex-A76 CPU
- Up to 8GB RAM (perfect for Docker workloads)
- PCIe 2.0 interface for faster storage (via adapters)
- Gigabit Ethernet & USB 3.0 ports
- Low power consumption compared to x86 servers
This makes it great for hosting applications like Plex, Jellyfin, FileBrowser, Pi-hole, Nextcloud, and more—all at home, without breaking the bank.
Step 1: Installing Ubuntu 24.04 LTS Server Edition
- Download the latest Ubuntu 24.04 LTS Server ARM64 image from the official Ubuntu site.
- Flash the image onto a microSD card (or SSD for better performance) using Raspberry Pi Imager or Balena Etcher.
- Insert the storage into your Pi, connect it to your network, and boot it up.
- Complete the initial setup (username, password, and network configuration).
Ubuntu Server gives you a minimal, command-line environment—perfect for container workloads.
Step 2: Installing Docker & Docker Compose
Update your system first:
sudo apt update && sudo apt upgrade -y
Install Docker:
curl -fsSL https://get.docker.com | sh
Add your user to the Docker group so you don’t need sudo every time:
sudo usermod -aG docker $USER
newgrp docker
Install Docker Compose:
sudo apt install docker-compose -y
Verify:
docker --version
docker-compose --version
Step 3: Managing Containers with Portainer
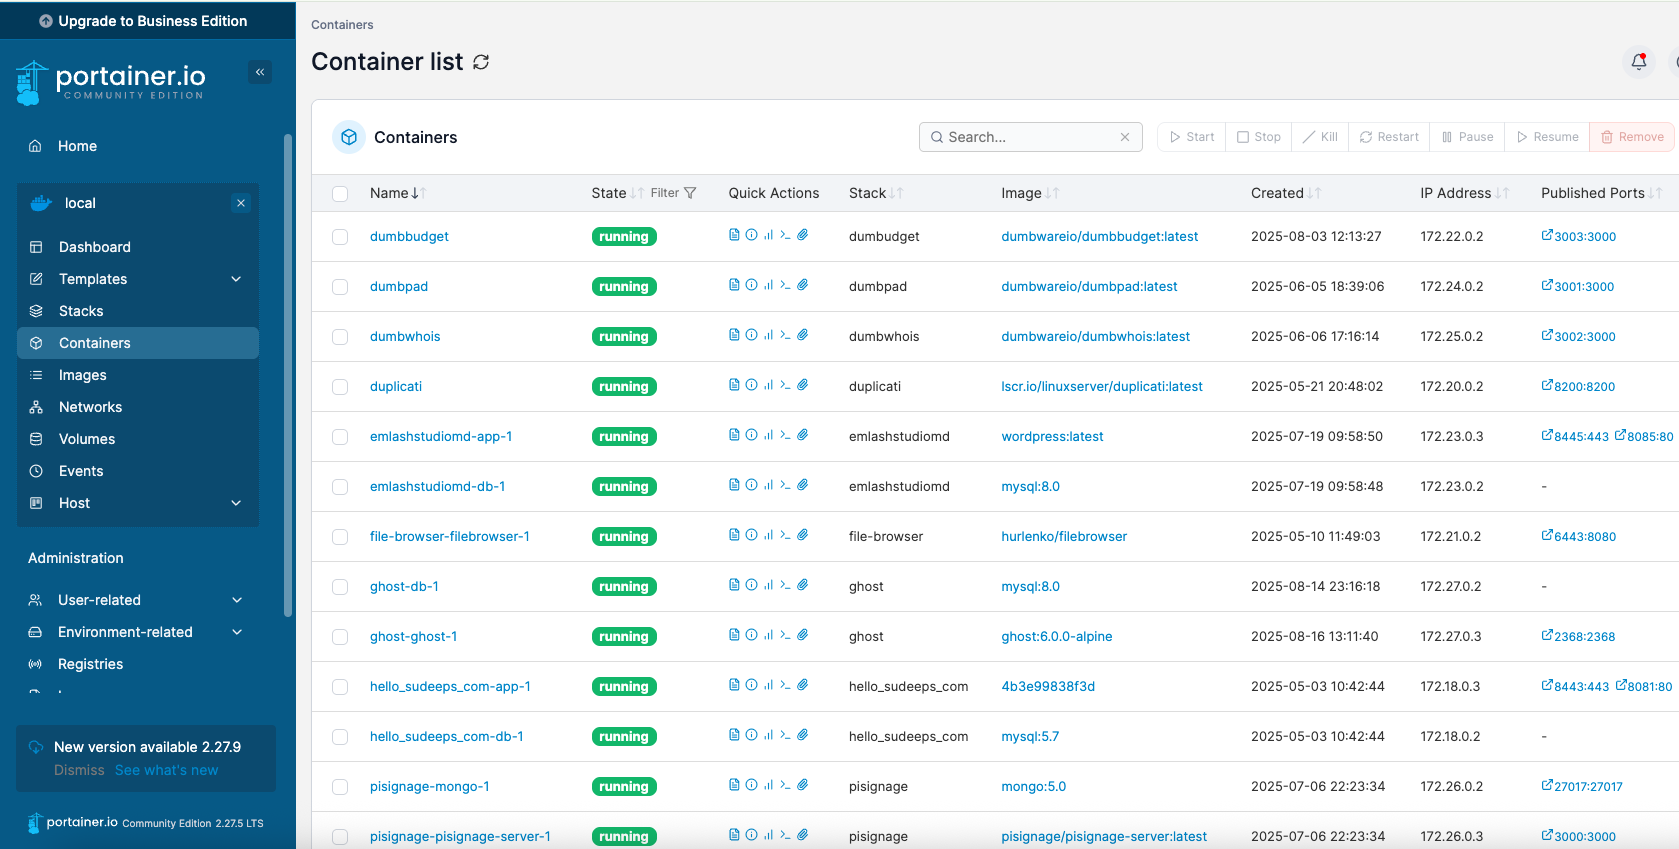
Instead of managing containers manually, we’ll use Portainer, a lightweight container management GUI.
Deploy Portainer with Docker:
docker volume create portainer_data
docker run -d \
-p 8000:8000 \
-p 9443:9443 \
--name portainer \
--restart=always \
-v /var/run/docker.sock:/var/run/docker.sock \
-v portainer_data:/data \
portainer/portainer-ce:latest
Now, open your browser and go to:
https://<your-raspberry-pi-ip>:9443
Set up your admin account, and you’ll have a clean dashboard to manage all your containers.
Step 4: Running Your First Applications
Jellyfin (Media Server)
A self-hosted media server alternative to Plex.
docker-compose.yml example:
version: "3.8"
services:
  jellyfin:
    image: jellyfin/jellyfin
    container_name: jellyfin
    volumes:
      - ./config:/config
      - ./media:/media
    ports:
      - 8096:8096
    restart: unless-stopped
Run with:
docker-compose up -d
OR create a new stack on Portainer and start the container.
Access Jellyfin at:
http://<raspberry-pi-ip>:8096
FileBrowser (File Sharing Across Network)
version: "3"
services:
  filebrowser:
    image: filebrowser/filebrowser
    container_name: filebrowser
    volumes:
      - ./data:/srv
    ports:
      - 8080:80
    restart: unless-stopped
Run with:
docker-compose up -d
OR create a new stack on Portainer and start the container.
Access FileBrowser at:
http://<raspberry-pi-ip>:8080
Step 5: Expanding Your Home Lab
Now that you have a working setup, you can experiment with:
- Plex – Stream your personal movies and TV shows.
- Nextcloud – Build your own private cloud storage.
- Pi-hole – Network-wide ad blocker.
- Uptime Kuma – Monitor uptime of your services.
- Vaultwarden – Self-hosted password manager.
All of these can be deployed using Docker and managed in Portainer with just a few clicks.
Final Thoughts
With a Raspberry Pi 5, Ubuntu 24.04 Server, and Docker + Portainer, you now have a flexible home lab environment. Whether you’re learning IT, testing new apps, or simply running services for your household, this setup is low-cost, energy-efficient, and endlessly expandable.
Thank you so much for taking the time to read my post! Your support and engagement truly mean a lot and inspire me to keep creating and sharing more valuable content. If you enjoyed this post, I’d love to hear your thoughts—feel free to leave a comment in the box below and join the conversation. And if you’d like to stay updated with the latest posts, tips, and insights, don’t forget to subscribe to my newsletter. By joining, you’ll be the first to know when new content is published, so you never miss an update.